2.3.1. Virtual environments and Jupyter notebooks
2.3.1.1. Starting the programming environment
Follow the instructions for getting access to a suitable programming environment on your computer. If you have any difficulties, ask a demonstrator in a lab session for help.
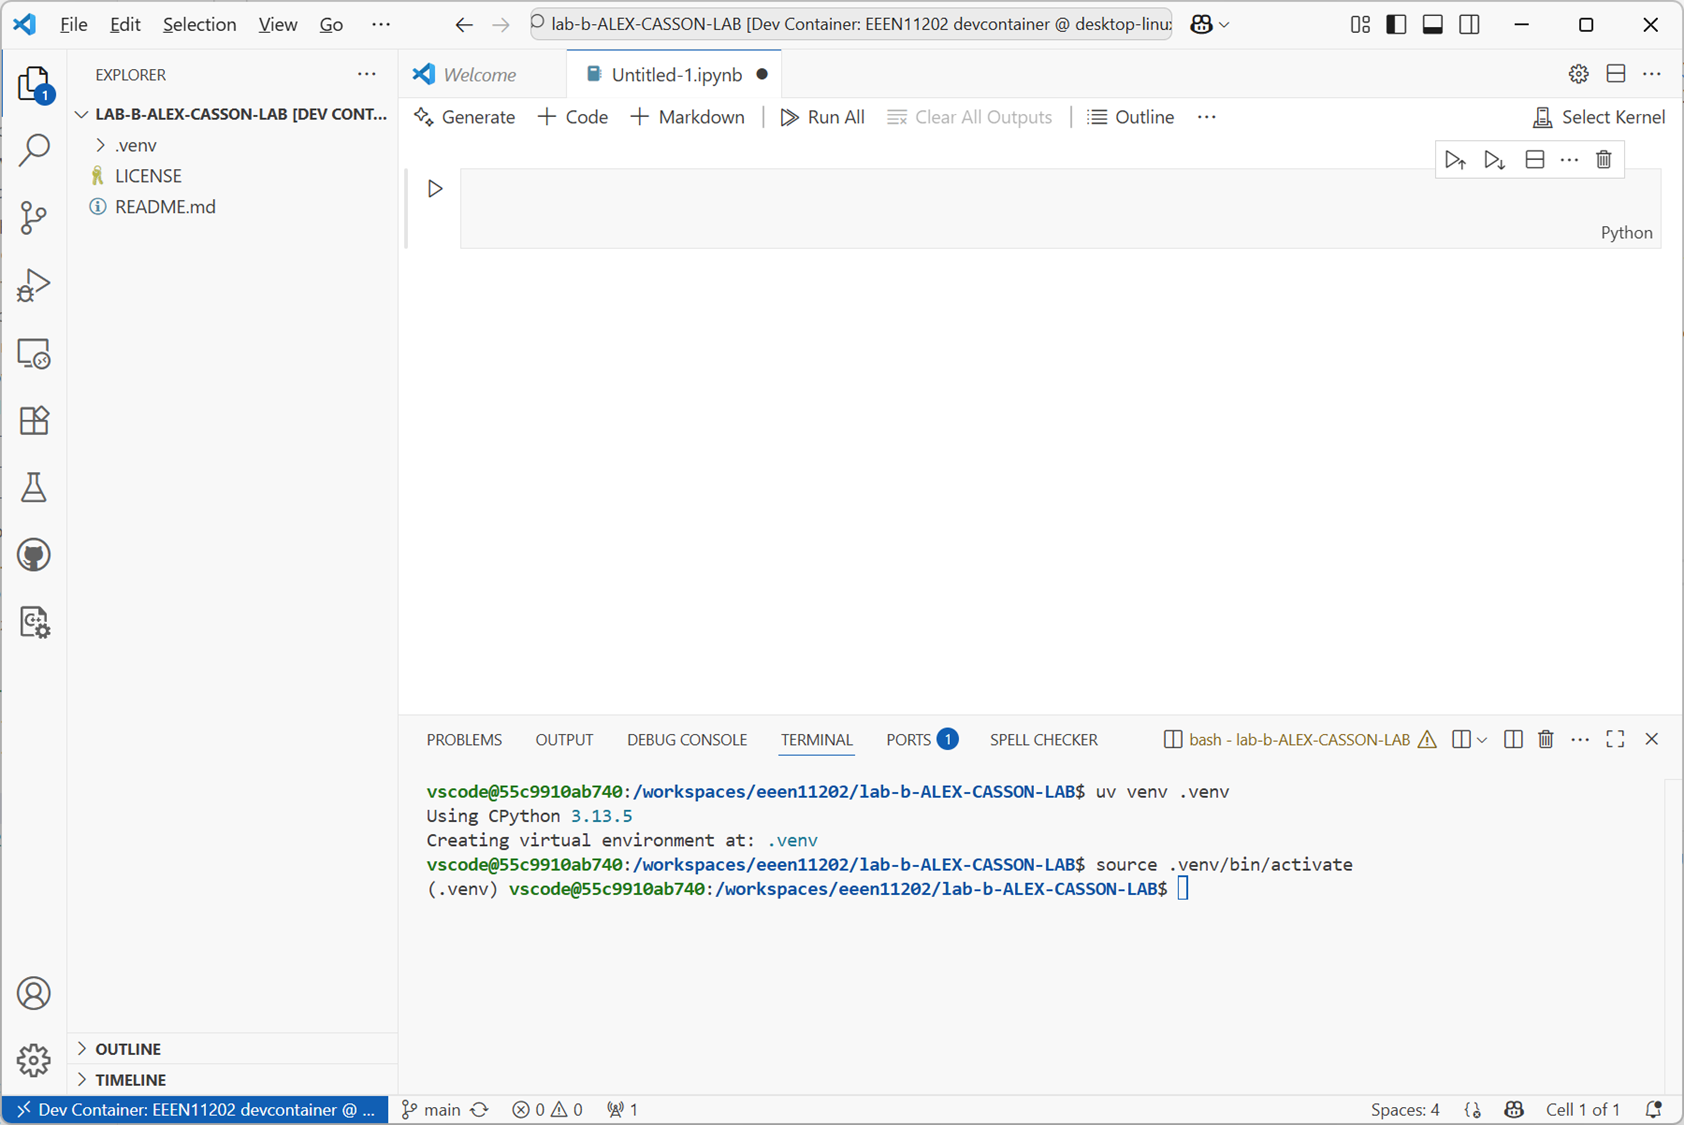
When done, you should have a view like the below. You’ll see there’s already a file called lab_b.ipynb present. We won’t use this until Assignment B
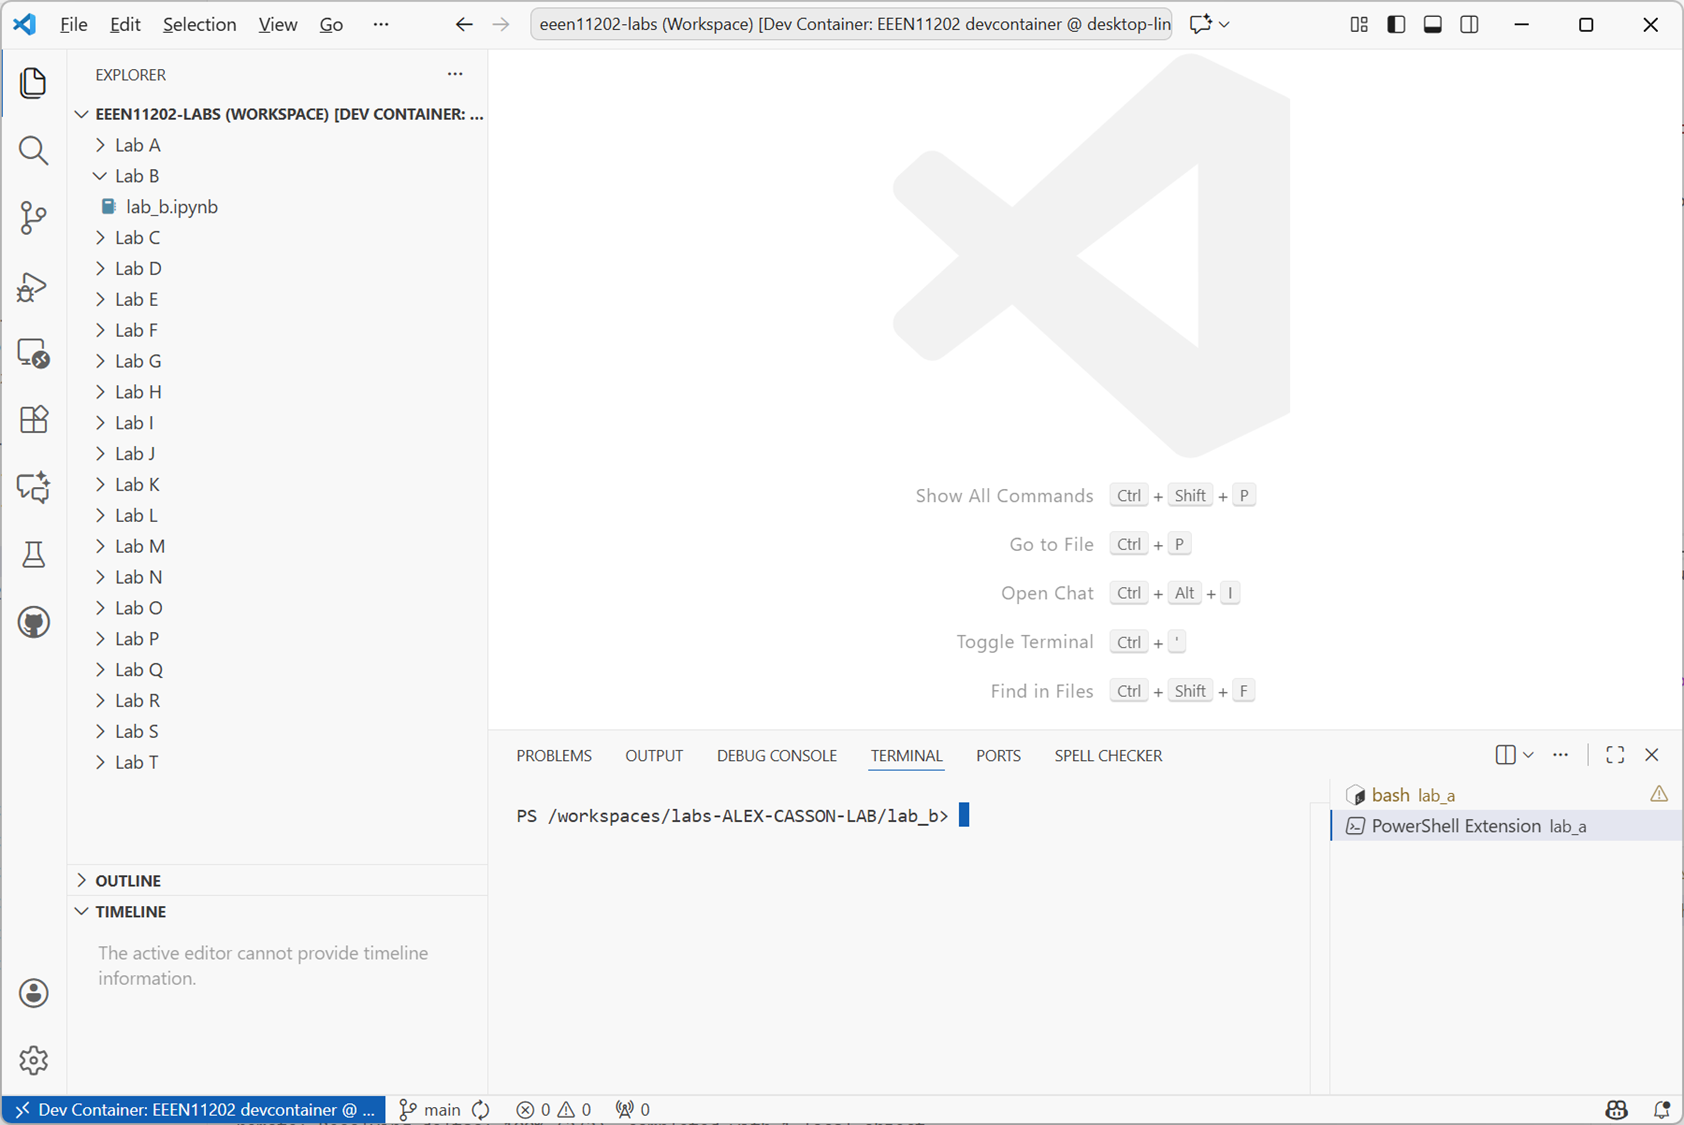
Screenshot of VSCode, software from Microsoft. See course copyright statement.
2.3.1.2. Making a virtual environment
Before we can start programming in Python we first need to make a virtual environment.
In Lab C we’ll make a Python project which automates some of this process for us. For this first Python lab however we’ll do it by hand to give you the experience. Using a Python project is best practice, but you’ll find lots of examples on the Internet that give you instructions to install things manually, and so we’ll give you some examples of this here so that you can do it if needed.
We make a virtual environment at the command line, as we used in Lab C. We’re not using Python yet! The command prompt in the terminal will look like $ rather than >>>. $ is the computer’s command prompt, while >>> is the Python command prompt.
Aside
There are multiple different ways of making a virtual environment. You may see examples on the Internet using
python -m venv .venv
or
conda create --name .venv
We’re going to use an approach with a tool called uv. If you see instructions using a different approach, they all have similar commands that are fairly intuitive to map between different tools.
In the VSCode terminal enter:
cd /workspaces/`ls /workspaces`/lab-b
uv venv .venv
Remember to enter these one at a time, not both together.
This will make a new virtual environment. The environment is called
.venv. The information it needs is stored in the current folder together with your code files, but in general you shouldn’t need to look at this. They’re there in the background to help Python work.To analyze these lines:
cd /workspaces/`ls /workspaces`/lab-bmakes sure we are working in the lab-b folder.uv venv .venvis the interesting command. This actually sets up our virtual environment.
The above command makes a virtual environment, but it doesn’t turn it on. In general, you only need to make a virtual environment once. You then just need to use it. To turn on the virtual environment, enter:
source .venv/bin/activateDone correctly
(.venv)will be displayed in the terminal to show which virtual environment you’re currently using. Your VSCode setup should look like the below.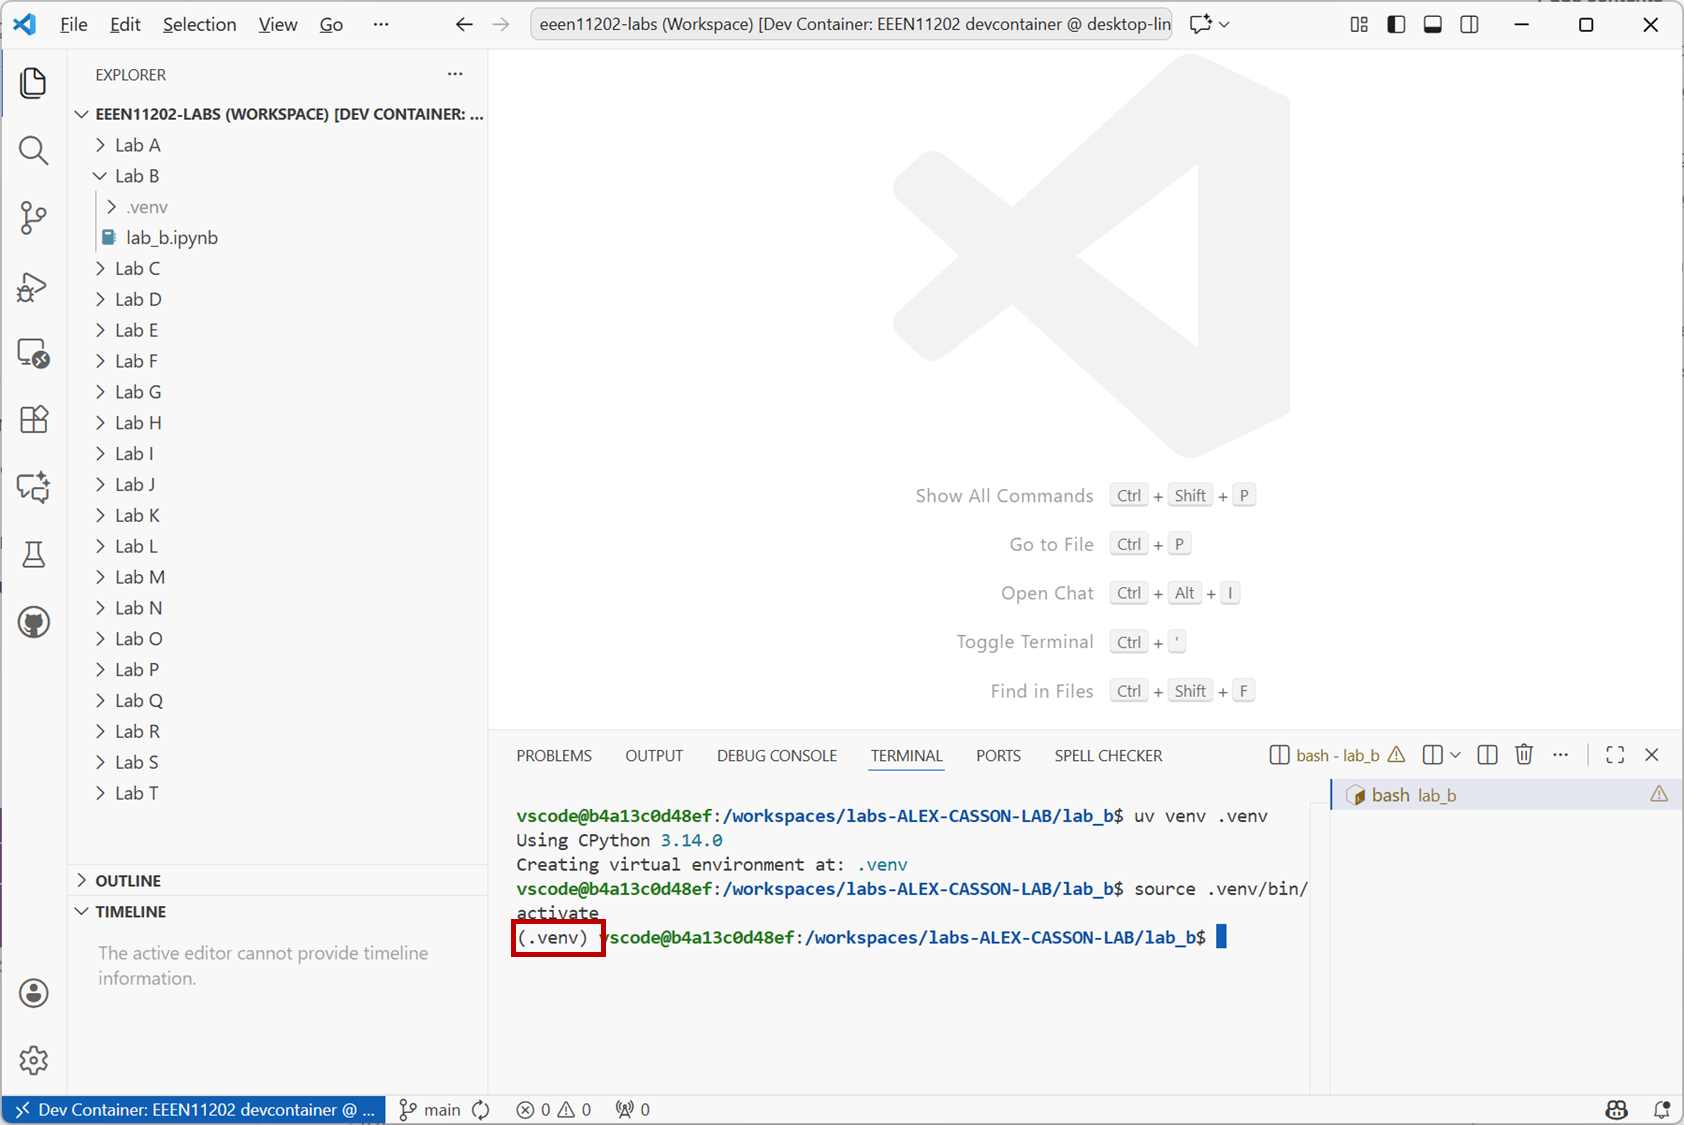
Screenshot of VSCode, software from Microsoft. See course copyright statement.
Install the
ipykernelpackage by entering the commanduv pip install ipykernel==6.31.0This will download some optional Python parts from the Internet and install them into your virtual environment. It’s important your virtual environment is turned on before you do this, otherwise it may be installed in the wrong place.
ipykernelis something that’s needed to make the Jupyter Notebooks we’ll use later on work. There are lots of optional packages that you can download from the Internet, it’s common to find online tutorials that ask you to runpip install <package-name>. As we’re usinguv, we actually useuv pip install <package-name>.
Aside
If you want to turn off a virtual environment after it’s been started you can enter deactivate in the terminal.
If you want to use a different name for your virtual environment you can enter uv venv my-venv where my-venv is the name you want. Note that the lab setup expects the virtual environment to be called .venv. If you use a different name you may get errors later on due to what our system is expecting the name to be.
If you want a specific version of Python in your virtual environment, rather than just the default, you can enter uv venv --python 3.14 .venv where 3.14 is the Python version you want. In general we’ll just use the default, but if you’re downloading Python code from the Internet it may well expect you to be using a specific version of Python.
2.3.1.3. Starting Python in Jupyter mode interactively
When working interactively we can store our commands in a file with a .ipynb extension. This is known as a Jupyter Notebook.
Make a new Jupyter Notebook. Go to the command palette, that is, the search box at the top of the VSCode window. Click
Show and Run Commands.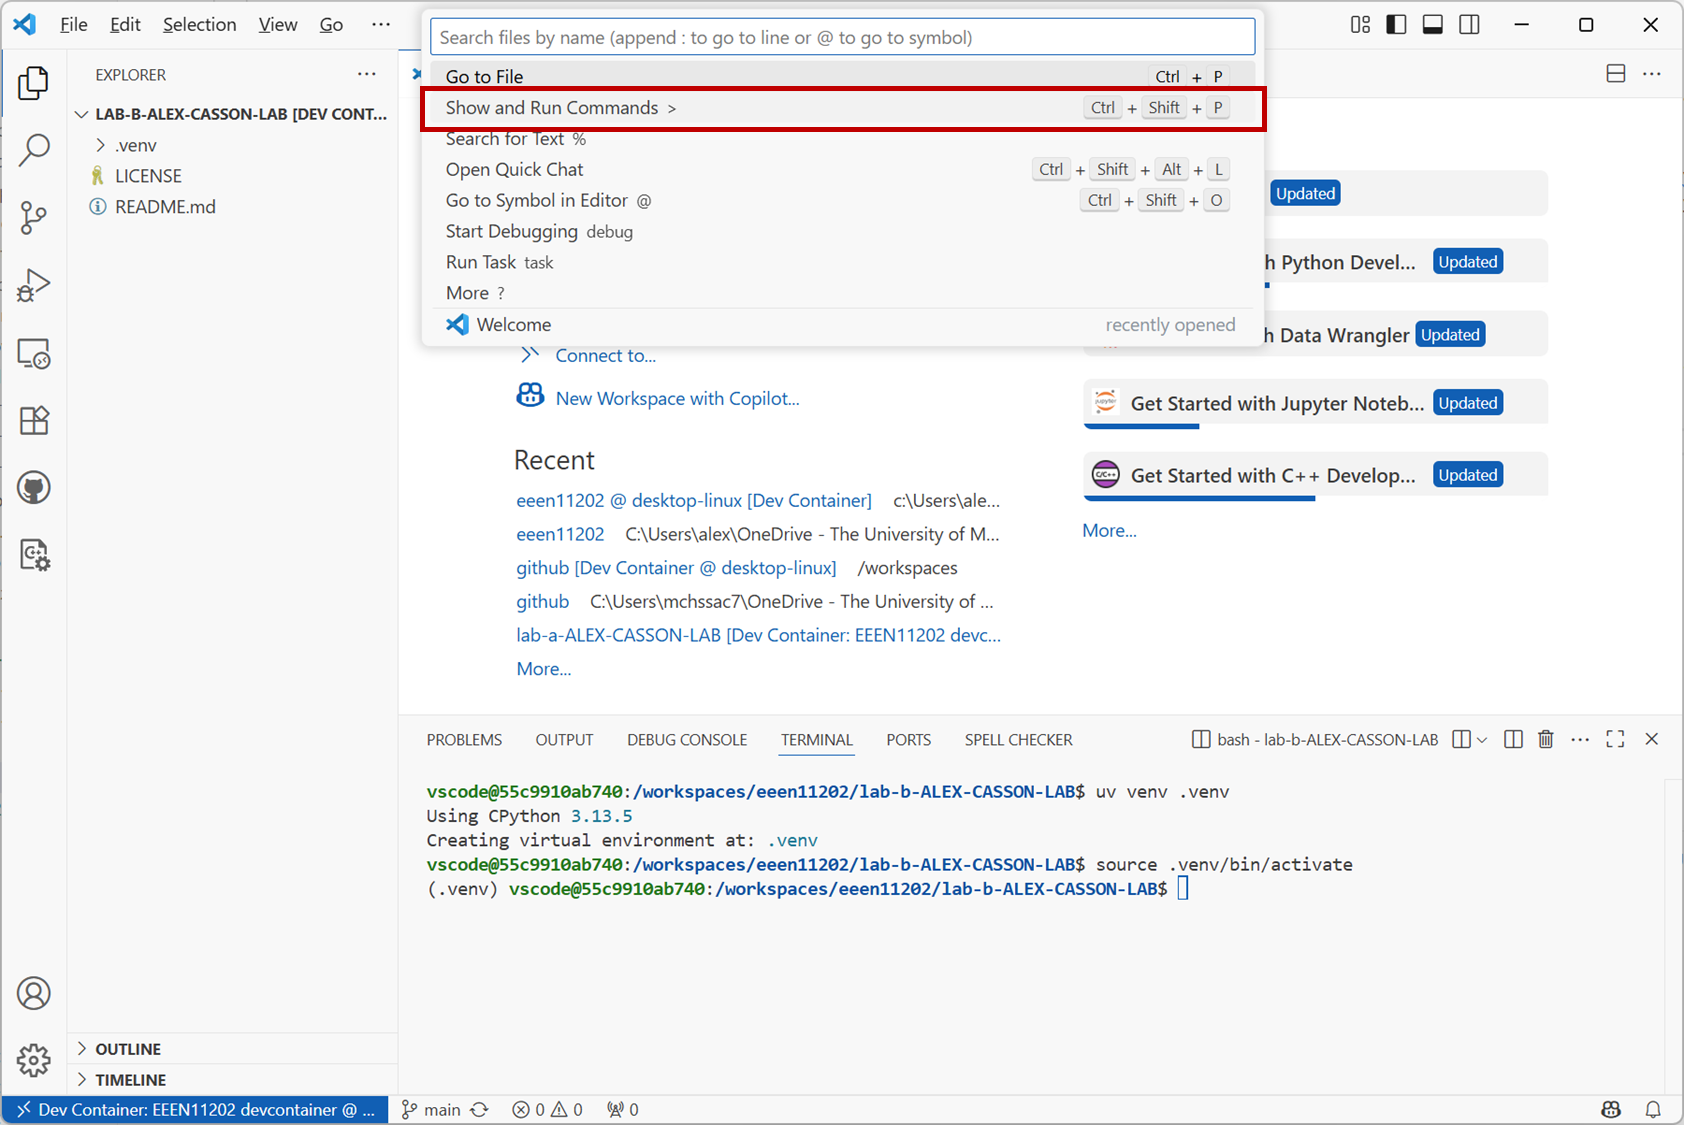
Screenshot of VSCode, software from Microsoft. See course copyright statement.
Search for
Create: New Jupyter Notebookand click on this option. Or, scroll down and select it from the list of available commands.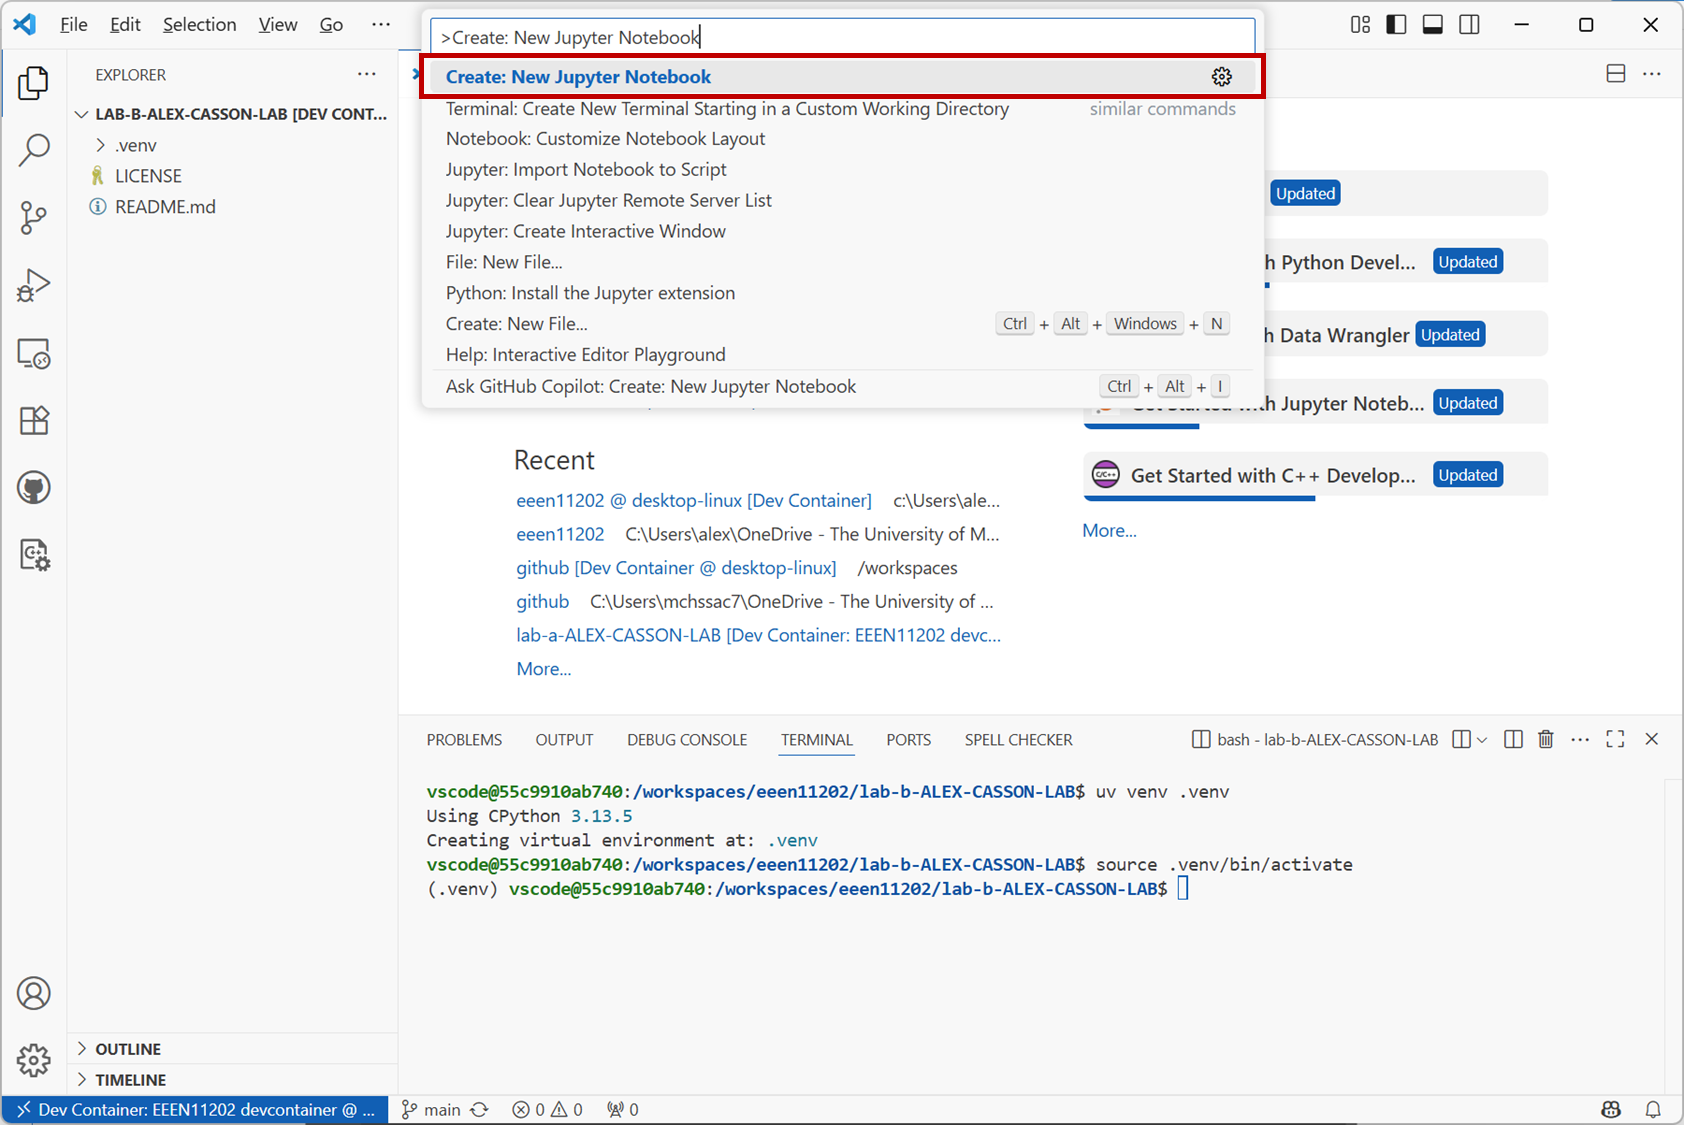
Screenshot of VSCode, software from Microsoft. See course copyright statement.
This opens a blank file, like that shown below.
Screenshot of VSCode, software from Microsoft. See course copyright statement.
You need to save this to give it a name. Click on
File / Save As...and enter a name. Anything is fine. In the example below it is calledmy_python.ipynb. Make sure you save it in your :console:`lab_b` folder.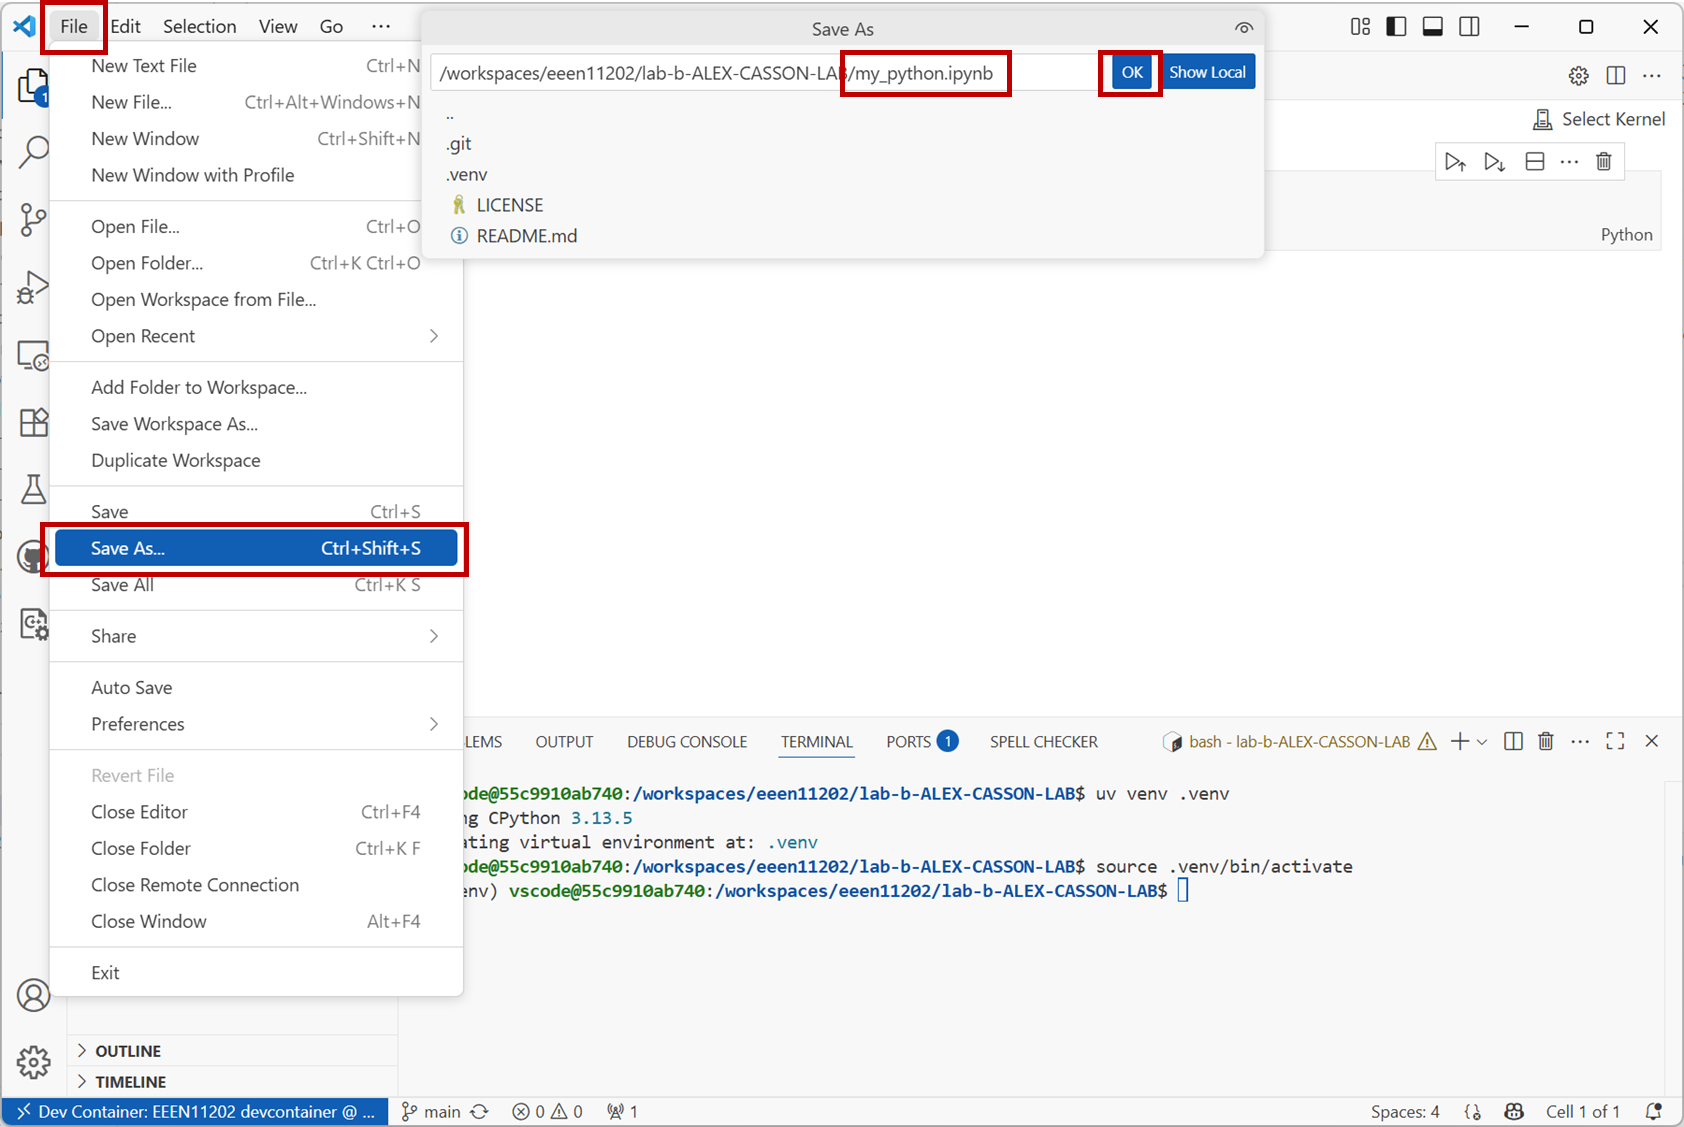
Screenshot of VSCode, software from Microsoft. See course copyright statement.
At the moment, the file is empty, and it also doesn’t know which virtual environment it should be using. You might have lots of different virtual environments on your computer as you work on more and more Python projects. You need to explicitly tell the file which to use.
Click
Select Kernelin the top right of the screen and then onPython Environments...in the dropdown that appears.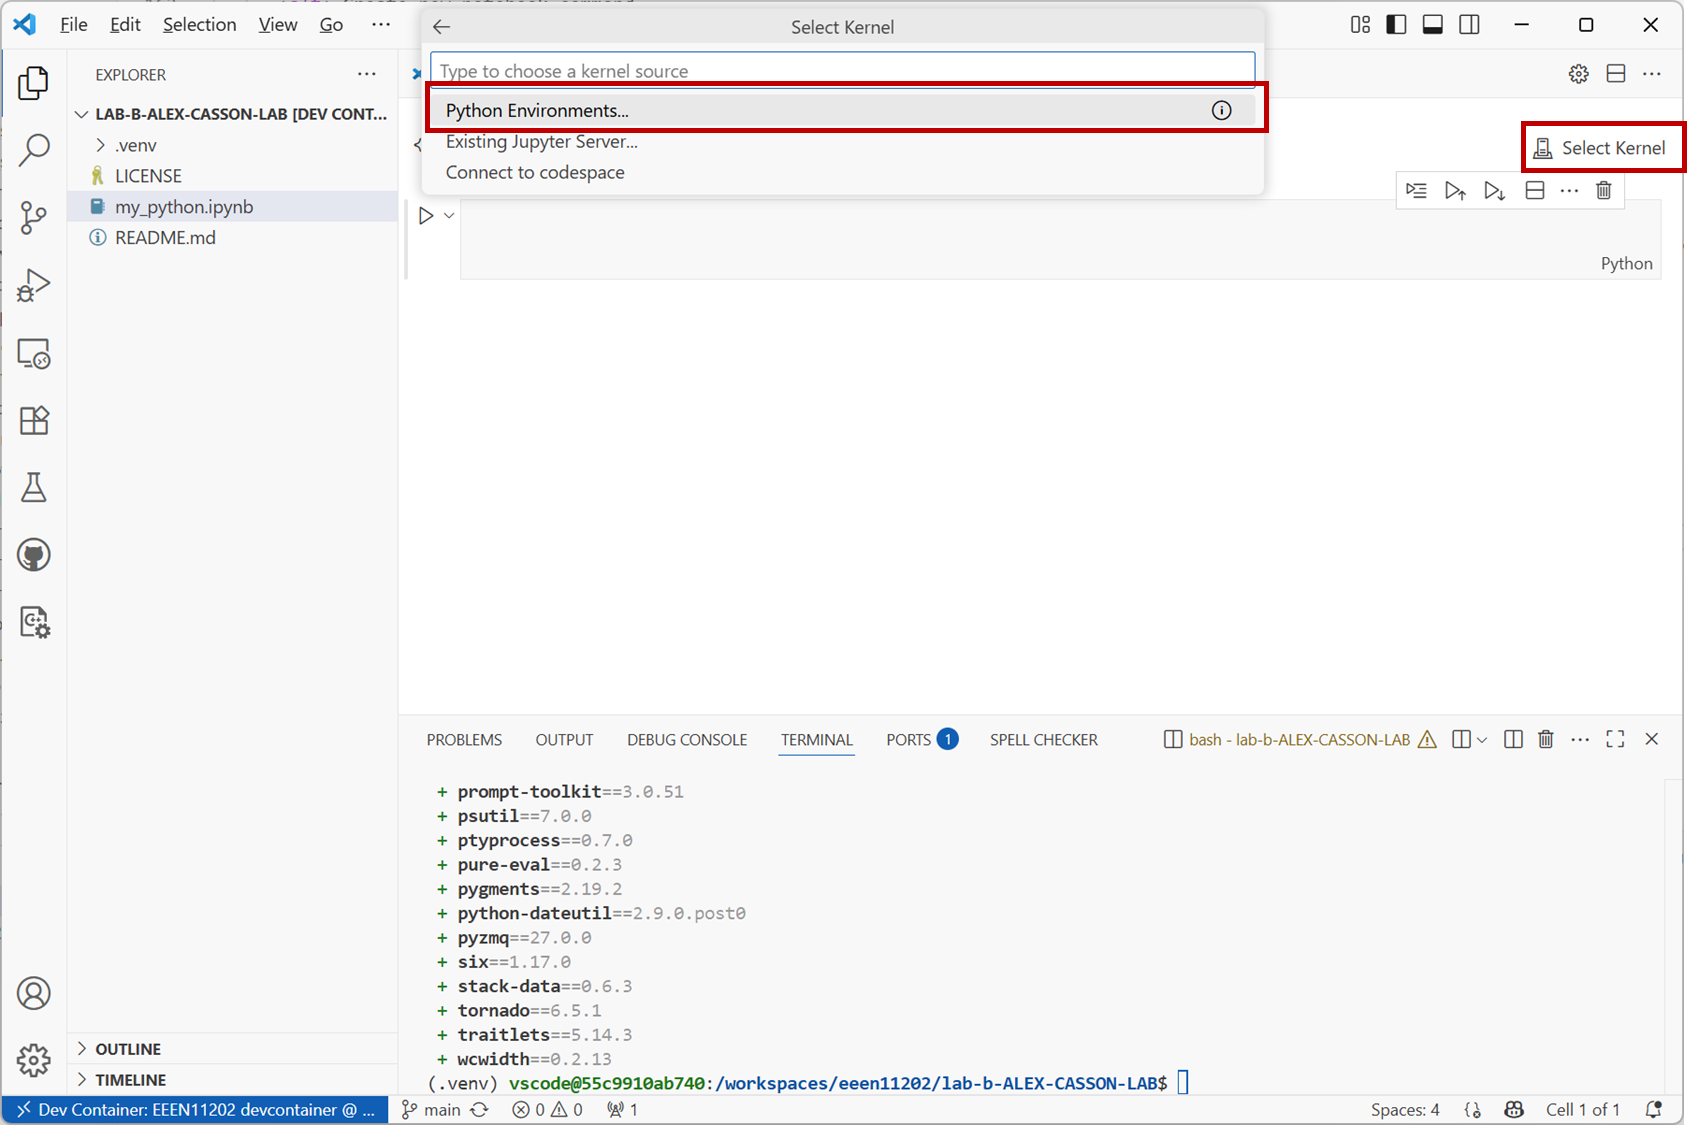
Screenshot of VSCode, software from Microsoft. See course copyright statement.
You may see a number of options here. Select the one called
.venv. In the screenshot below, the ones labelled/usr/and/bin/are the computer’s built-in Python environments. We don’t want to use these, we wnt to use the one we made specifically for this lab.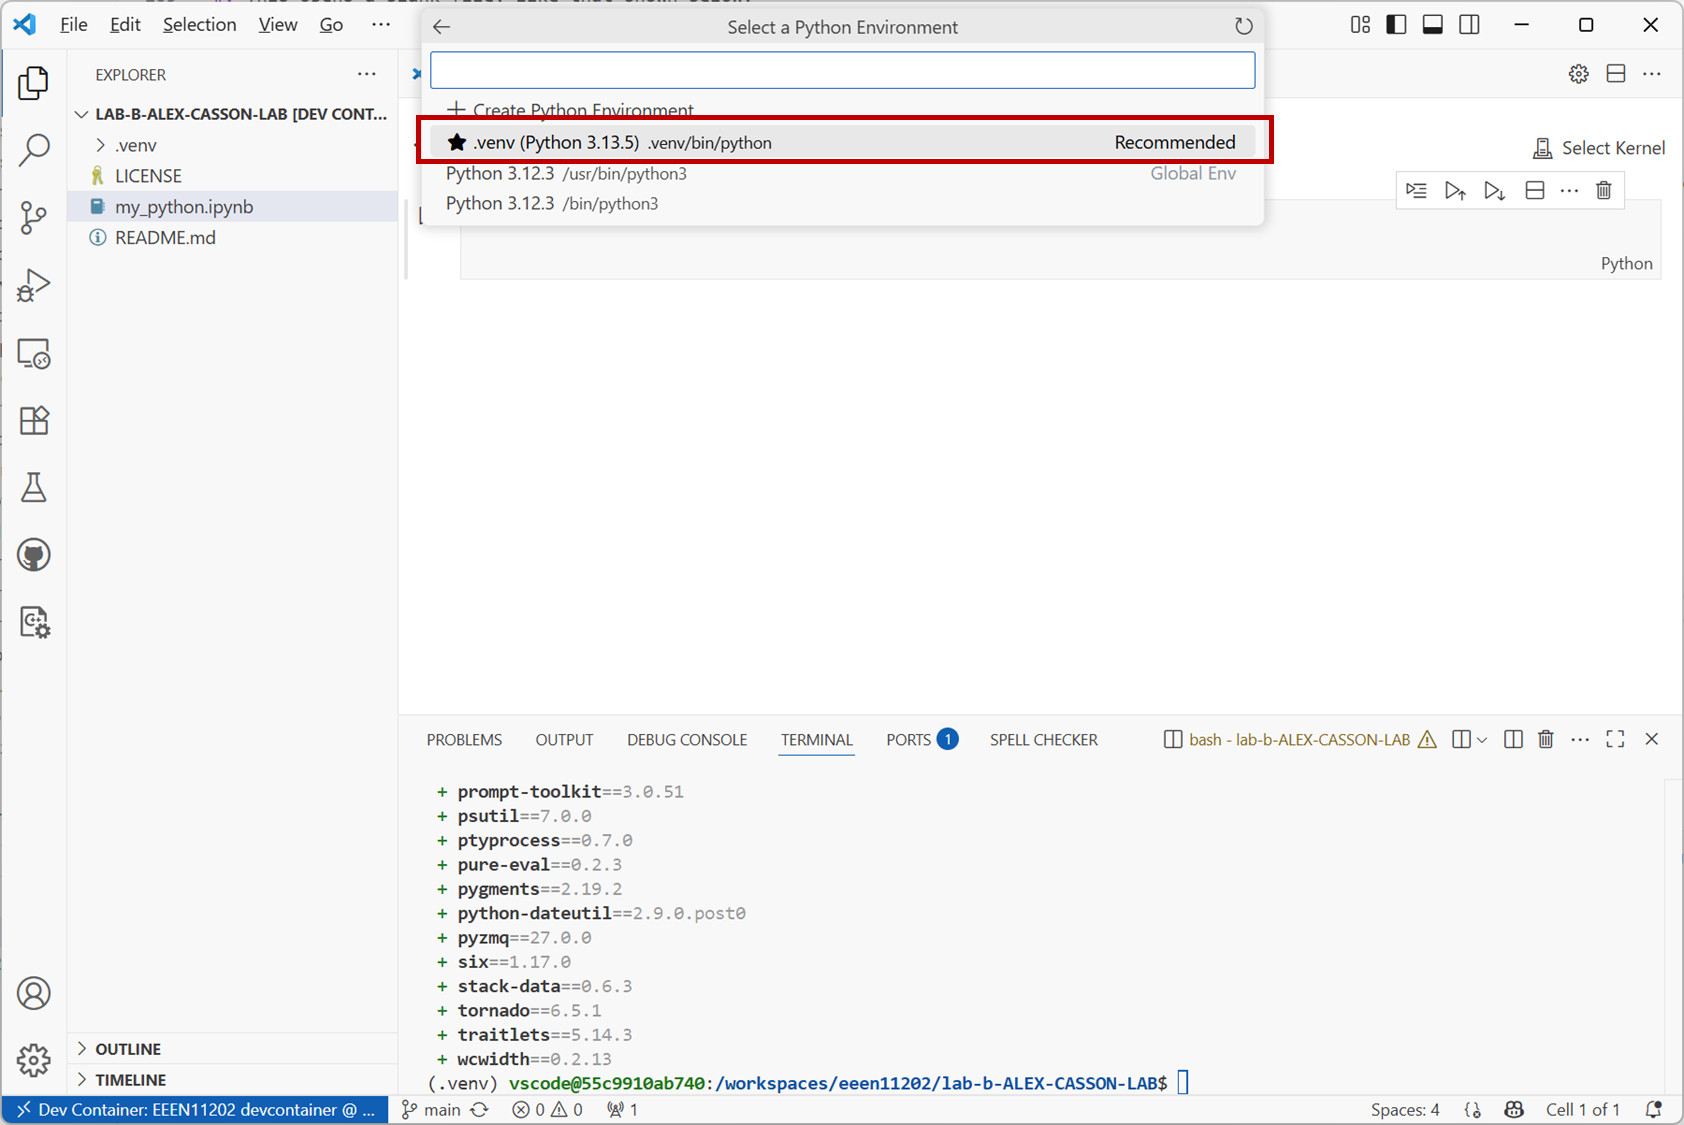
Screenshot of VSCode, software from Microsoft. See course copyright statement.
Done correctly, you’ll now see that VSCode displays the name of the virtual environment being used in the top right hand corner of the screen.
We’ll do one more customization before we starting writing code. This step isn’t critical, but it gives a slightly different interface, more similar to Matlab, which lots of electronic engineers are familiar with (or will become familiar with!) and so we’ll set it up this way.
Go to the command palette, that is, the search box at the top of the VSCode window. Click
Show and Run Commands.
Screenshot of VSCode, software from Microsoft. See course copyright statement.
Search for
Jupyter: Create Interactive Windowand click on it. This will open a new sidebar.Lastly, also click on
Jupyterin the horizontal bar in the middle of the screen.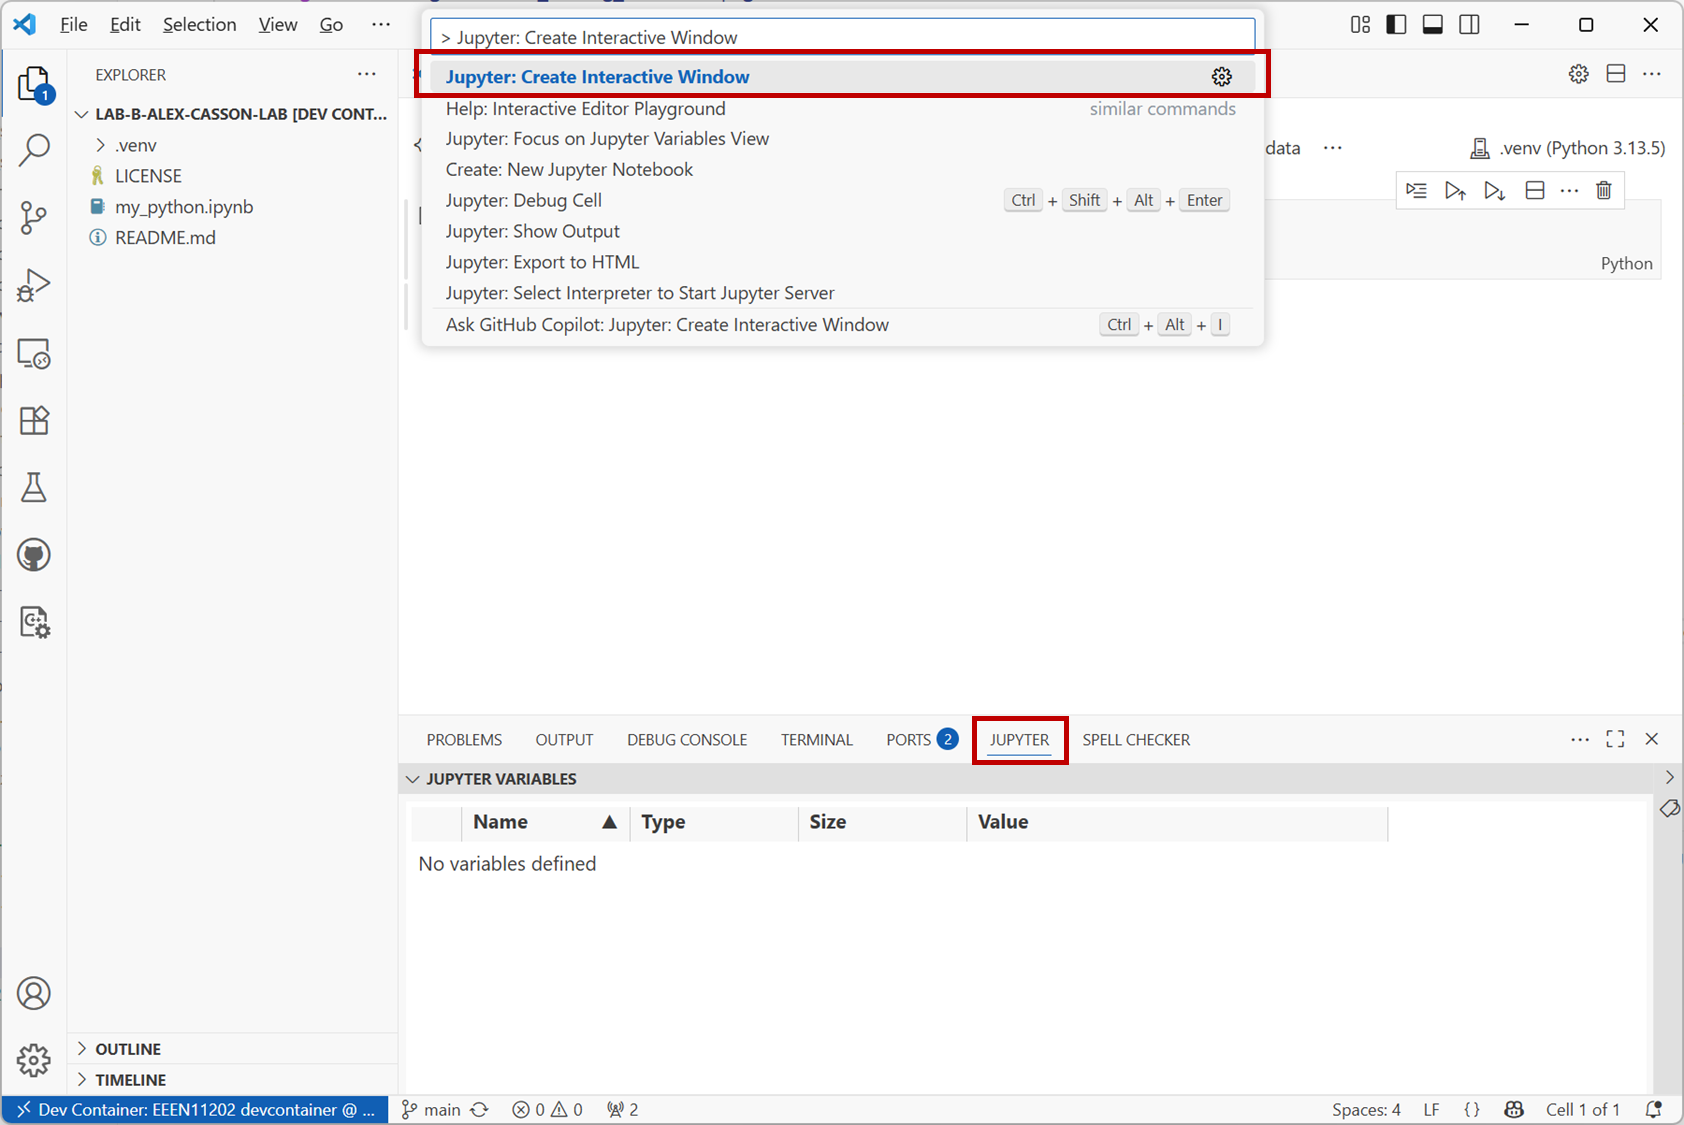
Screenshot of VSCode, software from Microsoft. See course copyright statement.
Your setup should look like that shown below, and we’re finally ready to start entering some code!
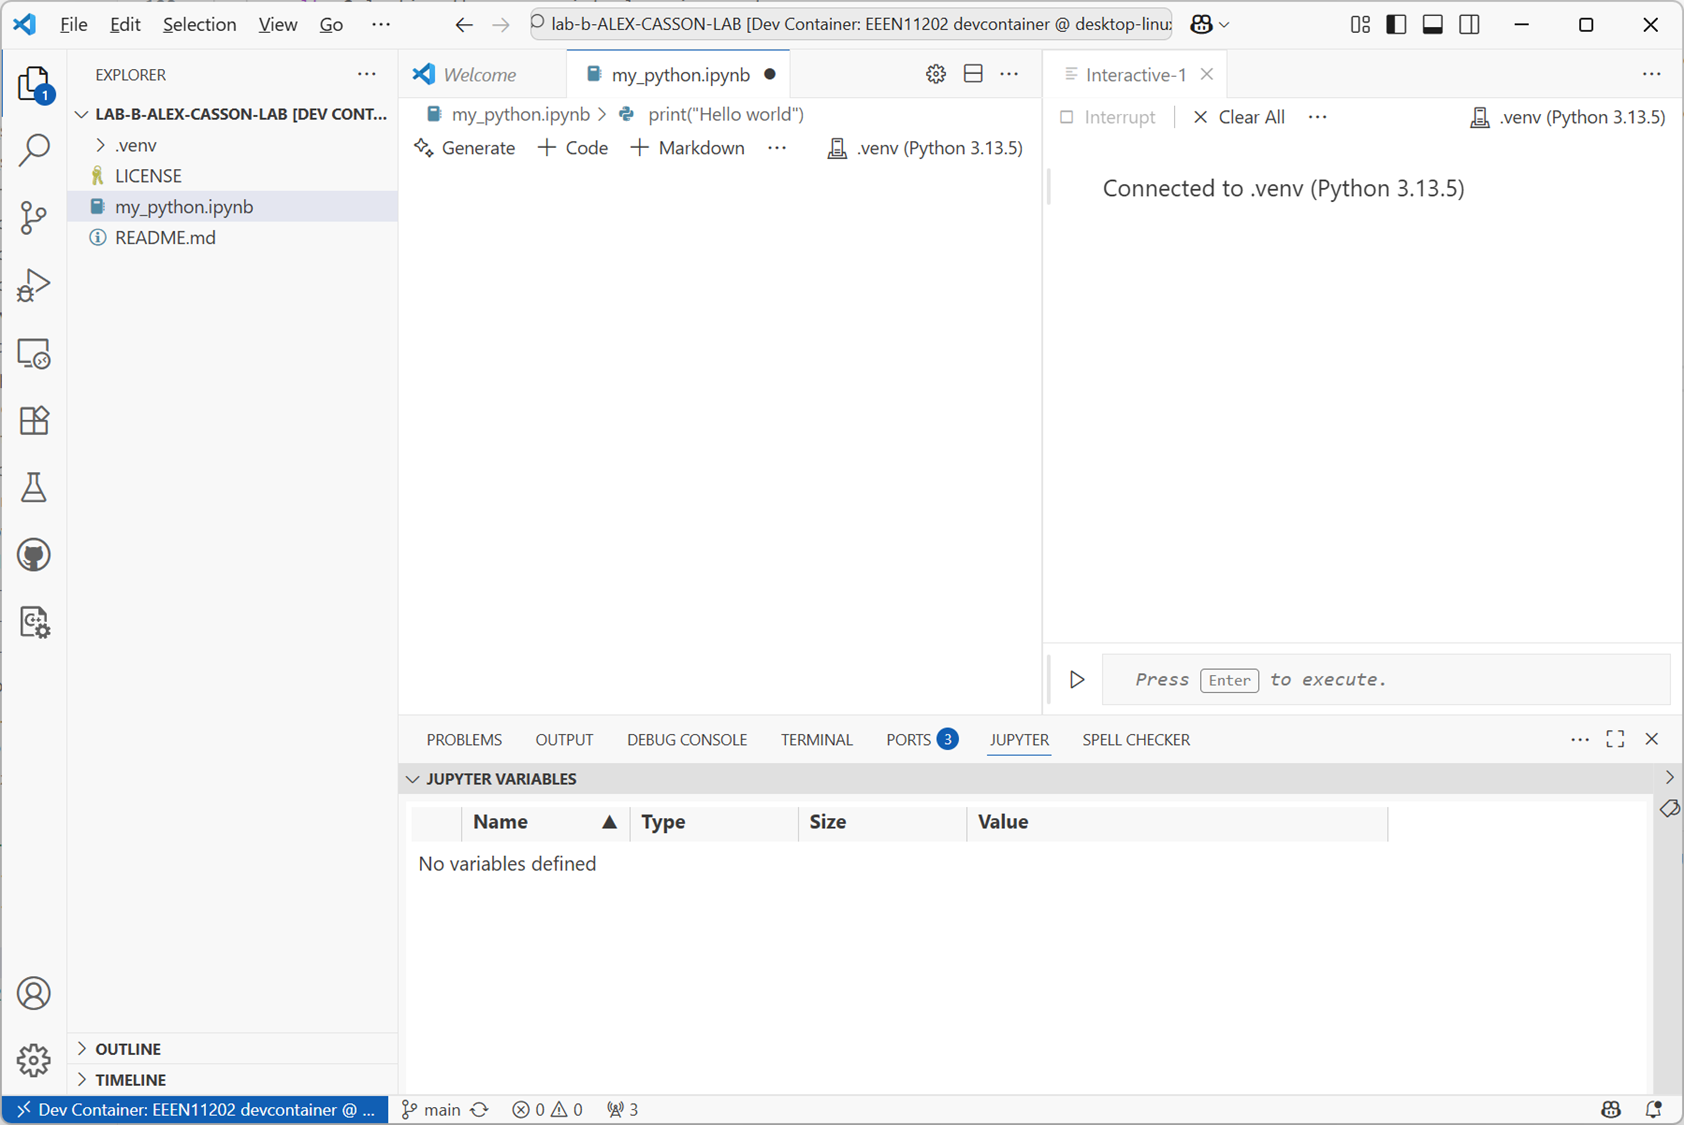
Screenshot of VSCode, software from Microsoft. See course copyright statement.
Recap
We’ve had quite a lot of steps there just to get everything set up. It’s possible to get going a bit more quickly, but we deliberately didn’t do this. Following the steps above will help as you move to bigger projects, and projects as part of a team. It makes it a little more complicated at first, but is worth it in the long run, as opposed to starting quickly and then building in bad habits.
Once you’ve done it a few times the process becomes very familar. Feel free to delete your files and try this part of the lab again to build familarity.
To recap the steps:
Start Docker and VSCode. This needs to be done every time you want to work on code.
Make a virtual environment. This only needs to happen once per project. If one’s already been made you don’t need to do it again.
Activate the virtual environment. This needs to be done every time you want to work on code in this project.
Install any packages needed for the project. They only need to be installed once. (Recall that in Lab C we’ll start using Python projects that will help automate this step.)
Make your Python file. Or, if carrying on an existing project, open the file you want to work on.
Write your code!
2.3.1.4. Running some Python commands
We’re now ready to start entering Python commands!
Before we do this, we’ll take a little time to familarise ourselves with the VSCode Python interface. This is shown below, with each of the major parts numbered.
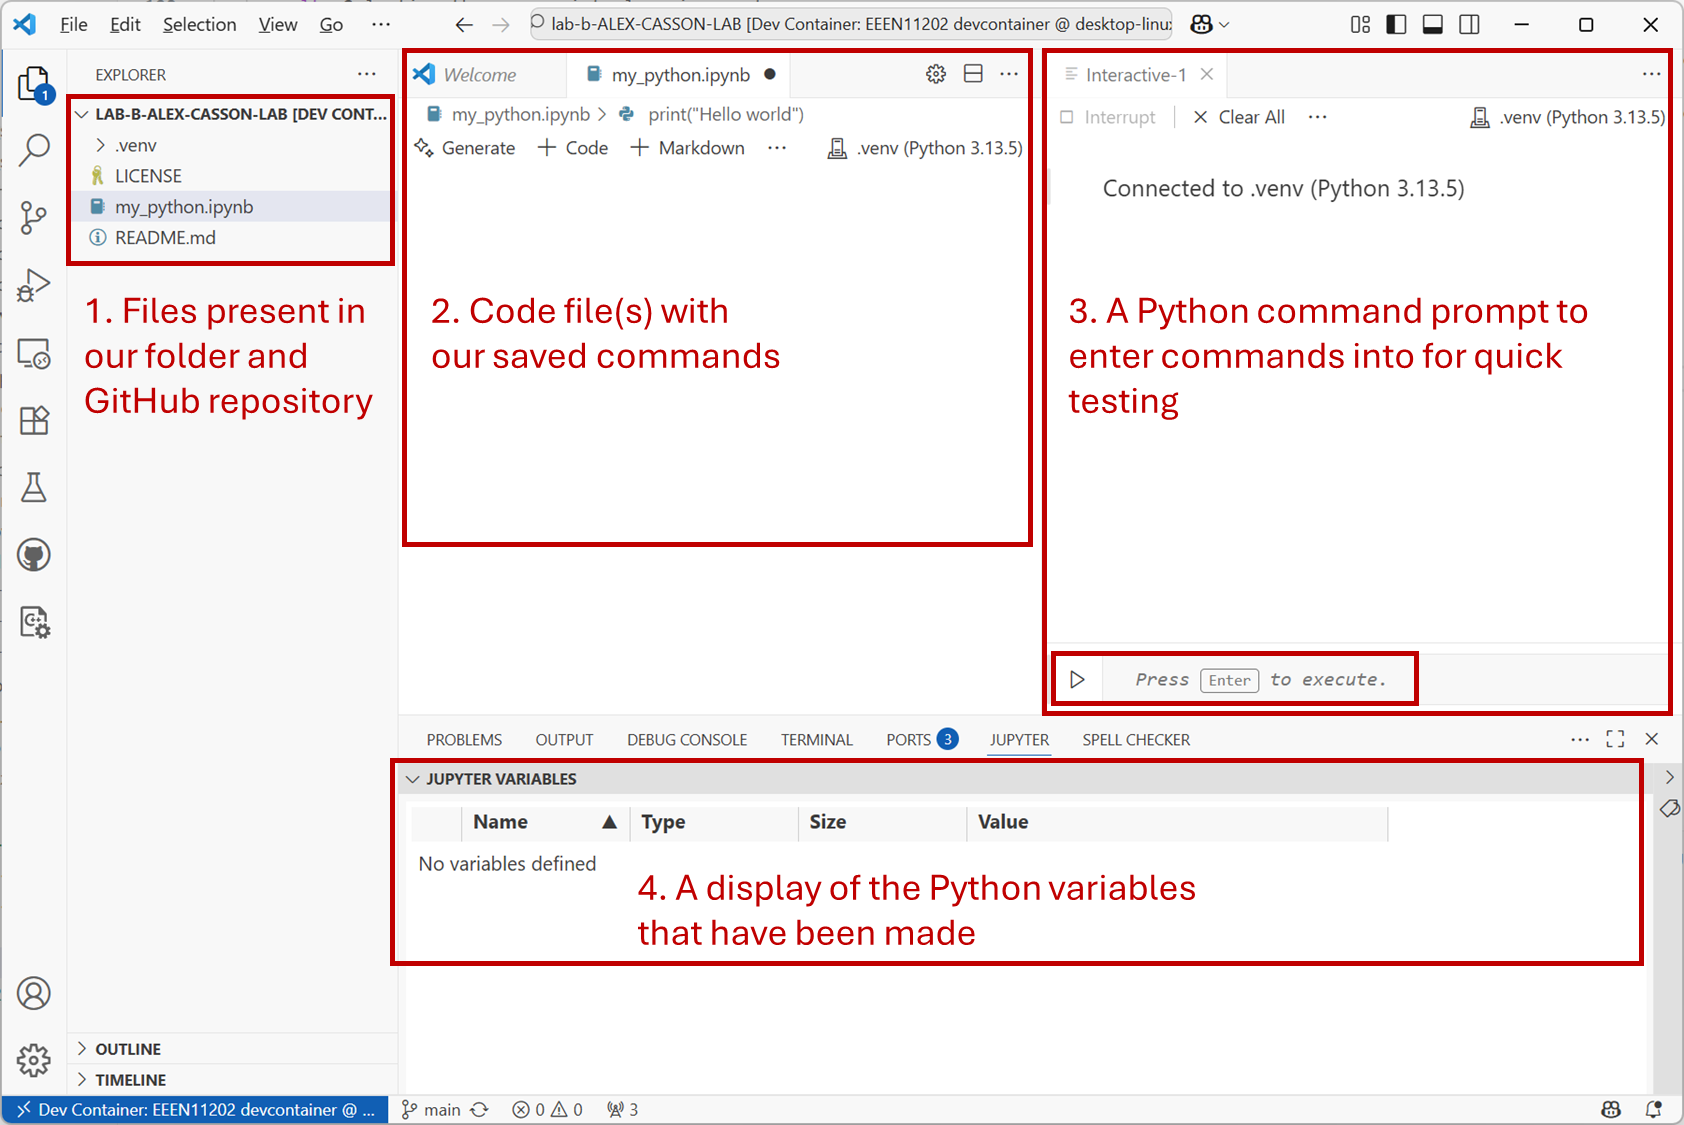
Screenshot of VSCode, software from Microsoft. See course copyright statement.
There are four main parts.
The file explorer. This is a display of the files in the current folder. You can click on them to open them. When we start off, all of our code will be in one file. For larger programs it is common to split code across multiple files to help keep it organized.
The file display. This shows the contents of a code file. It is where we enter the Python code. The commands are saved in a file so we can run the same commands later on.
A Python command prompt. Here we can enter Python commands one at a time. This can be a little confusing - we can enter Python into the Python file or into this Python prompt. In general we want to do the former, we write our Python into a file. That way it’s saved and we can run the same commands again. Nevertheless, having a prompt present as well is useful for carrying out a few quick tests and calculations. It’s a useful addition, even if it’s not where we enter code by default.
A display of what variables have been made. This is useful for exploring the results of the code once it’s been run, allowing us to check that the variables contain what we would expect.
2.3.1.4.1. Interactive Python
First use we’ll use the Python command prompt. This is part number 3 in the figure above.
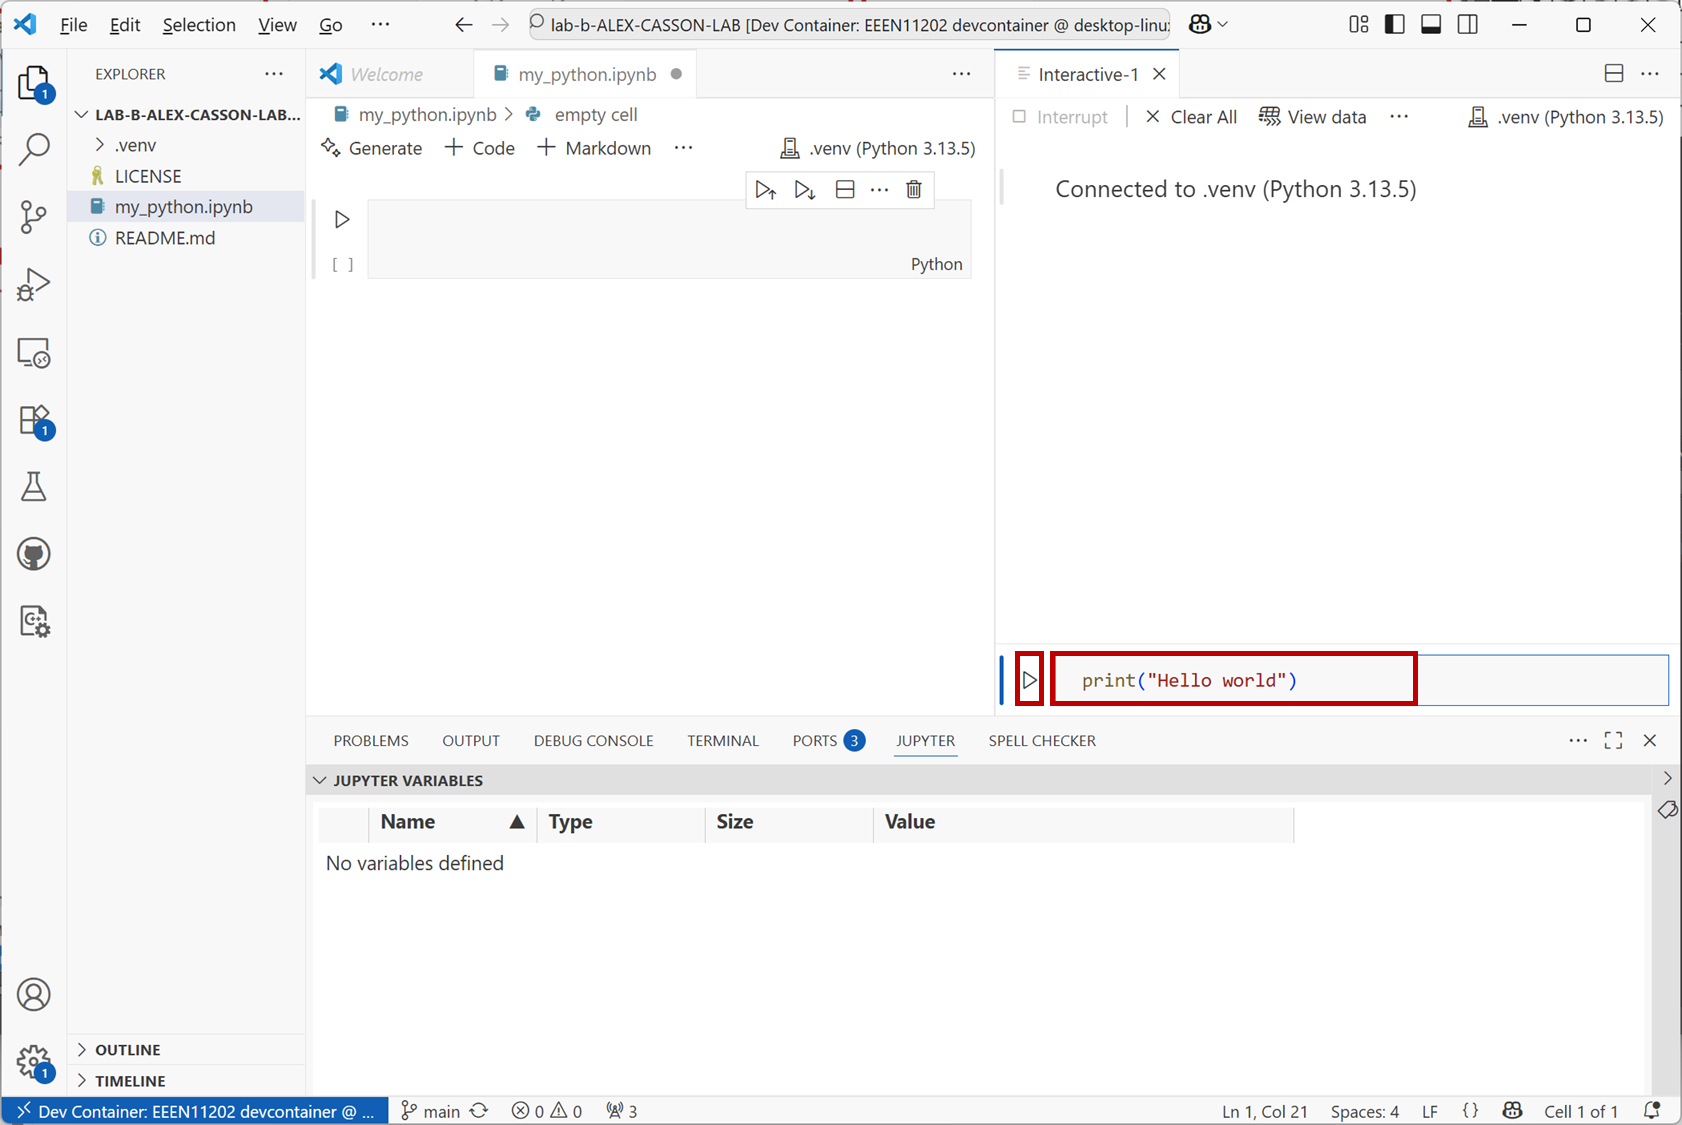
Enter
print("Hello world")
and press Enter on the keyboard, or the Execute button. (Remember, you don’t need to enter the >>> this is to show where the command prompt is.) This code will display Hello world in the Interactive Python window.
Screenshot of VSCode, software from Microsoft. See course copyright statement.
Try doing a simple calculation. Enter the command below then then press the Execute button
a = 2 + 2
You should get a result like the below. Note that Python hasn’t actually displayed the result of this sum for us! It’s put the result in a variable called a. If you look at the variable explorer (part number 4 in the figure above) you’ll see that a has been created, and it has a value of 4.
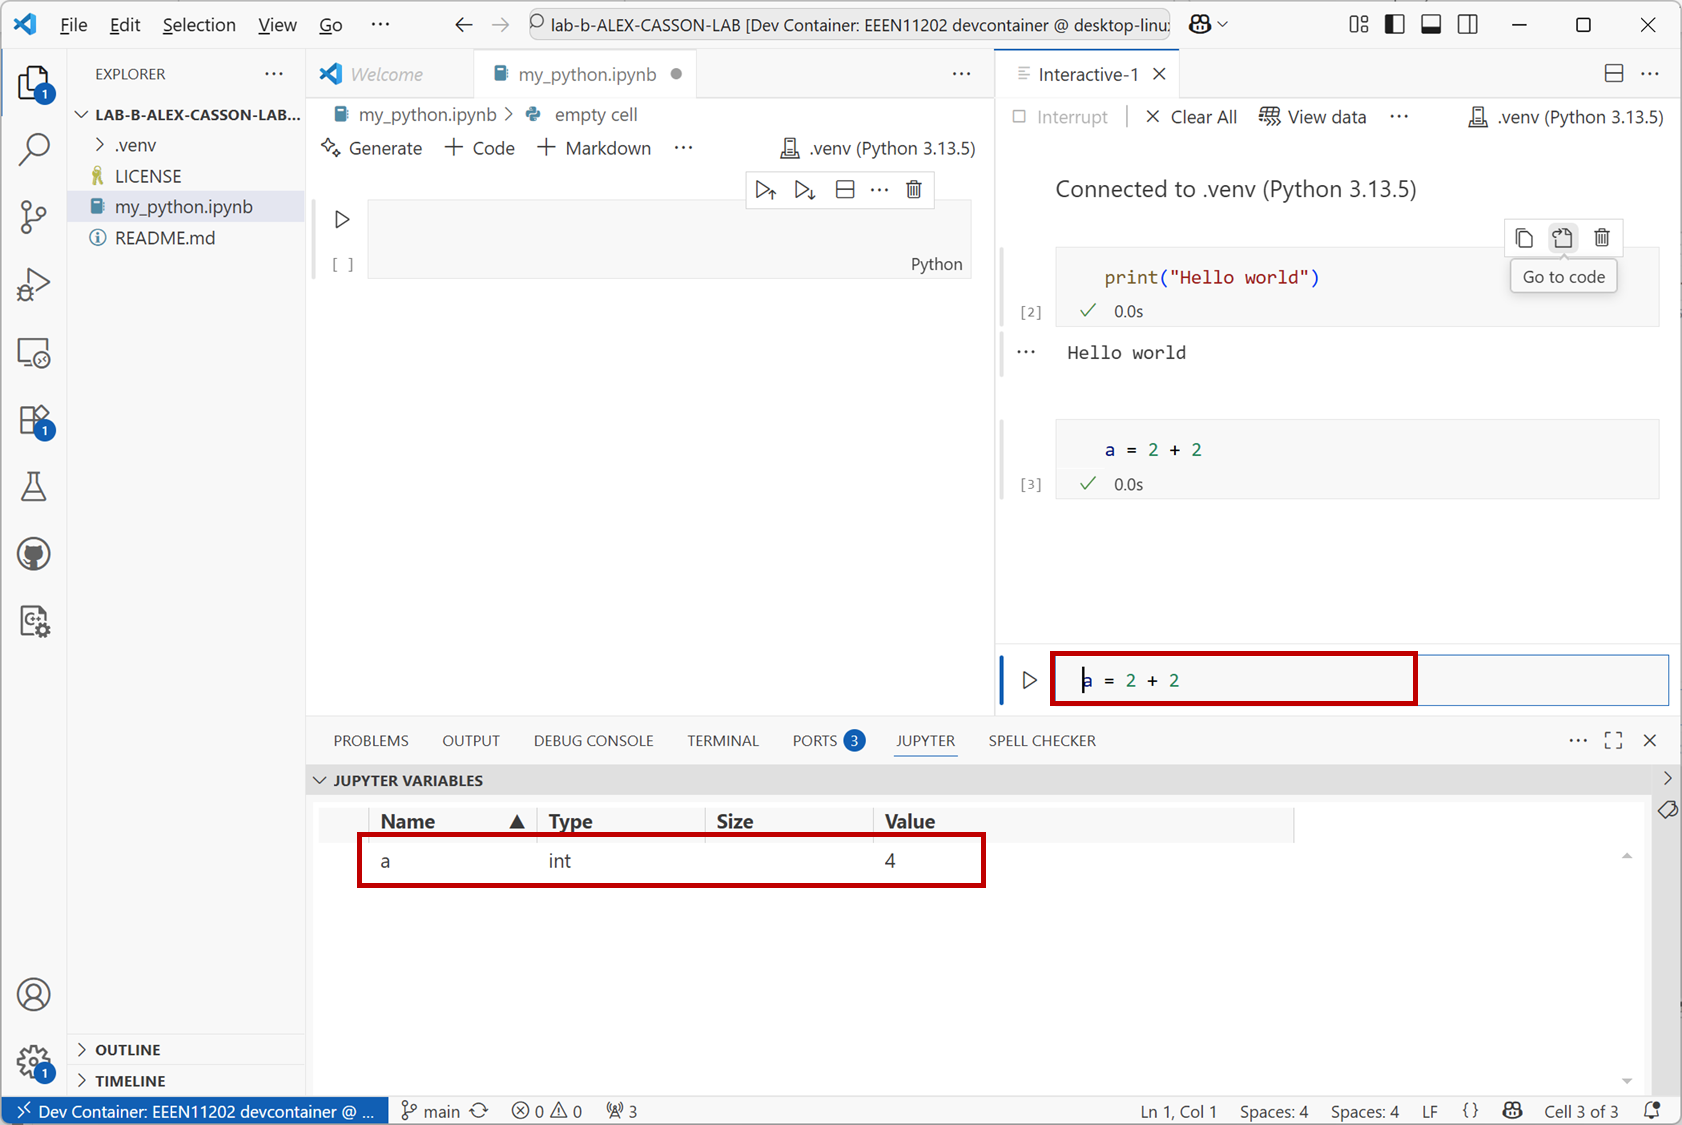
Screenshot of VSCode, software from Microsoft. See course copyright statement.
When the cursor is in the Python command prompt you can press the Up arrow on the keyboard to see the previous commands that you’ve entered. This is useful for quickly re-entering commands that you want to run again.
We won’t do any more with this interface for now, but remember that it’s available for quick calculations if you want it in the future.
2.3.1.5. File based Python
The interactive Python prompt works well, but is generally for entering a single command at a time. When we have lots of commands to run, we want to store them in a file. At the moment we’re looking using Python in the Jupyter mode interactively approach. We’ll look at other methods in future labs. The Jupyter mode interactively approach includes a number of features to help us write an organise code.
Code is organized into cells. We can run a single cell at a time, or all of the cells together. This is useful for testing code, as we can run a single cell to see if it works, and then run the rest of the code once we’re happy with it.
Open your
.ipynbfile and enterprint("Hello world")
into the cell that’s present. Then press the
Execute Cellbutton.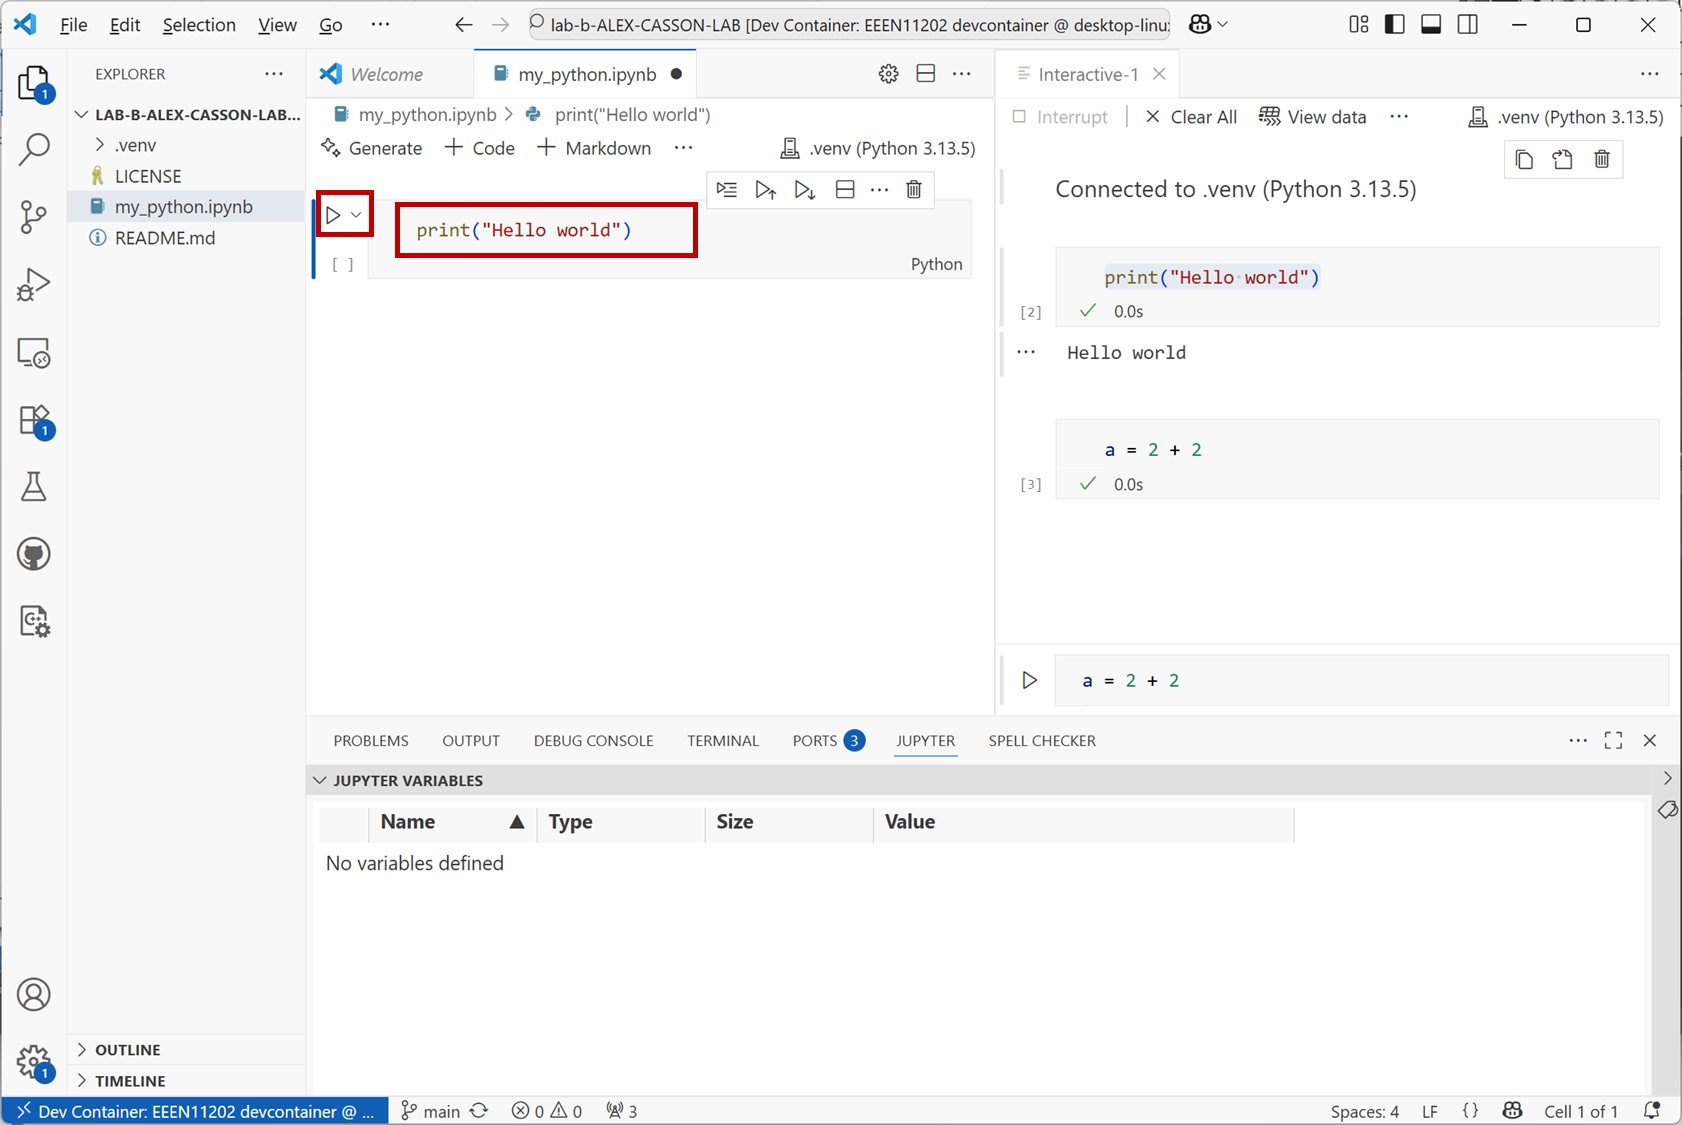
Screenshot of VSCode, software from Microsoft. See course copyright statement.
You’ll see
Hello worlddisplayed.You can add multiple lines of code into a single cell, but for now let’s practice making a new cell and putting code into that.
Press the
+ Codebutton to make a new cell. In this new cell, enter the codeb = 3 + 3
Then press the
Execute Cellbutton that’s next to this new cell.As before, Python doesn’t actually display the result of this sum (unless we explicitly ask it to). Instead, you can see in the variable explorer that a variable
bhas been created.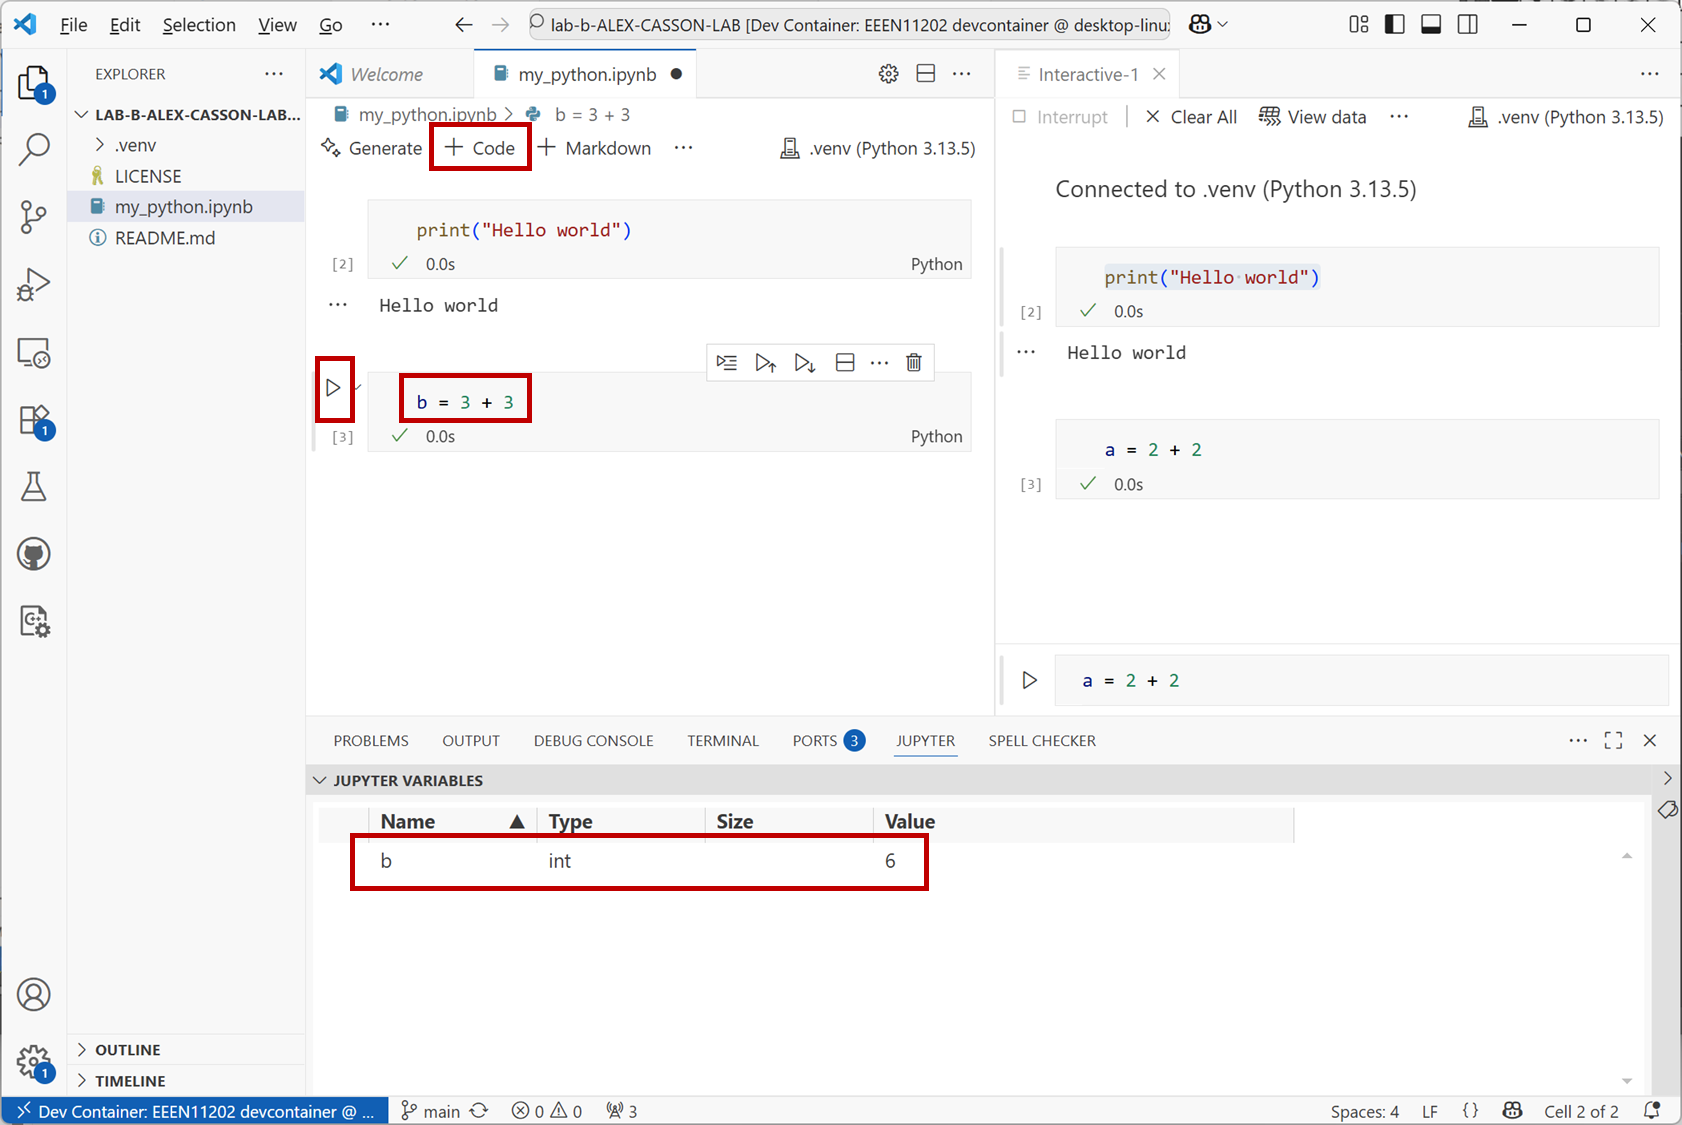
Screenshot of VSCode, software from Microsoft. See course copyright statement.
Make another new cell and enter the block of code
# Changing the value of b
print("Hello again")
b = 3 * 3
Run this cell. It includes a comment, which is for us to read but isn’t executed. There are then two commands. After running the code you’ll see that the value of
bhas been updated.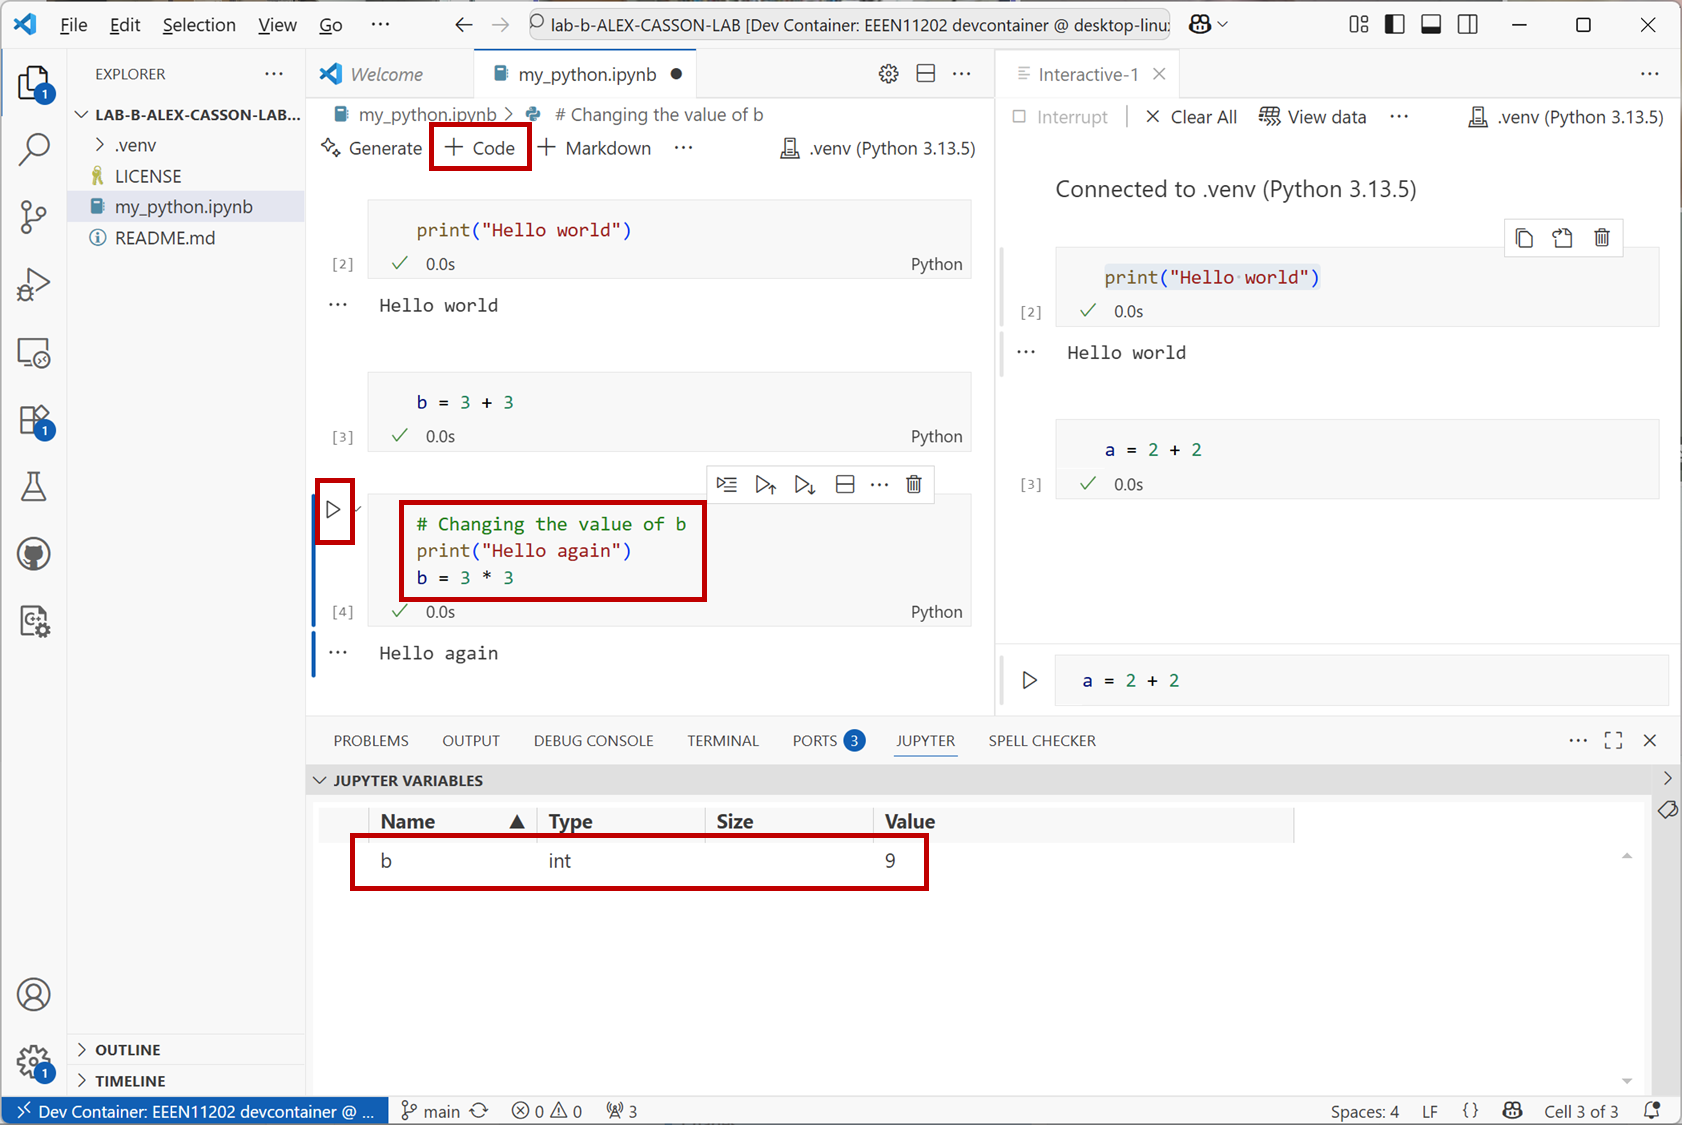
Screenshot of VSCode, software from Microsoft. See course copyright statement.
This is a code file, and so you can edit any part of it and re-run the code. You don’t have to just keep adding things on the end.
Click back in the box where you entered
print("Hello world")and change this to now haveprint("Hello Alex")(or whatever your name is). Then click on theExecute Cell and Belowbutton and all of the cells will be run again.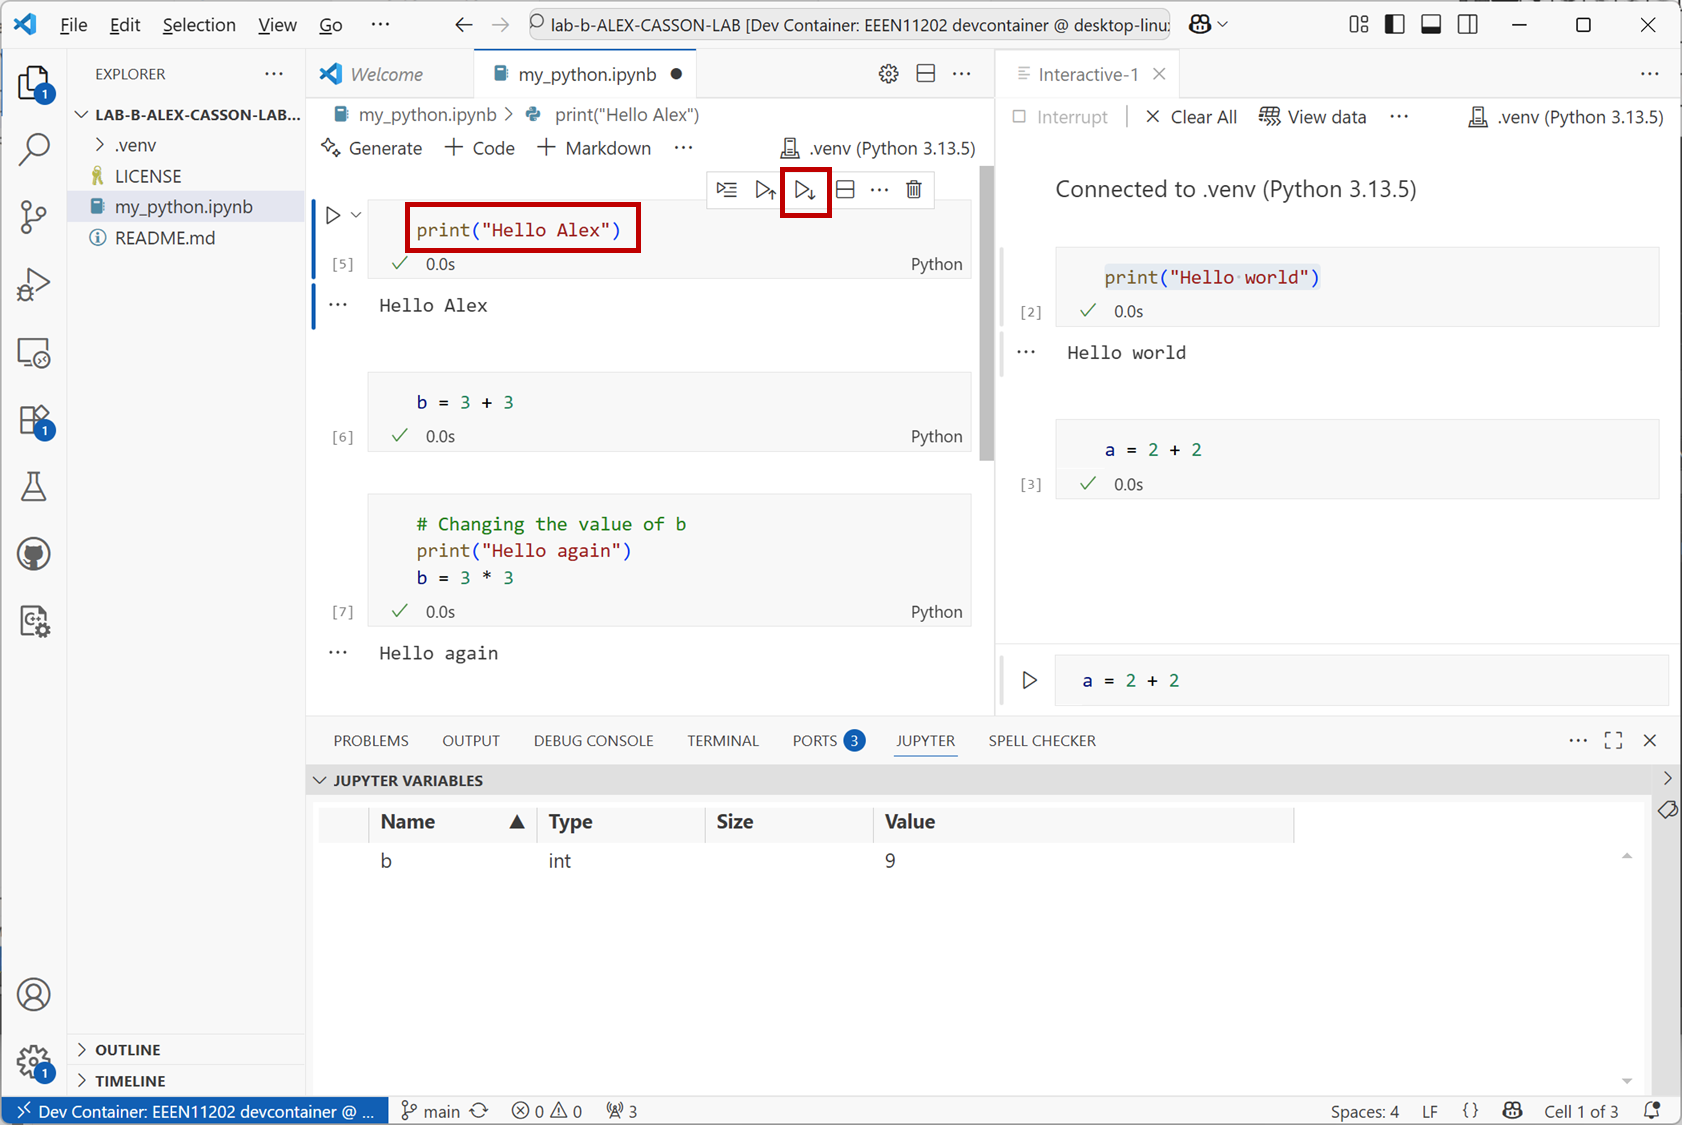
Screenshot of VSCode, software from Microsoft. See course copyright statement.
There’s lots of other functionality available in the interface. Take some time to edit the commands you’ve already entered and re-run the code. Explore different options that the interface provides. For example, how do you delete a cell?