5.2.2. Multi-file scripts
This is a smaller topic, to be helpful as we start to write longer code.
So far, we’ve essentially written all of our Python code to be in a single file. (Apart from the unit tests which were in their own files.) It’s fine in principle to have all of our code in one file, but as the code gets longer and longer it can get hard to manage. Remember that practical coding problems can easily have thousands, or even millions, of lines of code.
There are no hard rules for when to split code into multiple files. Similarly, for what to put in which files. You could group all of your functions into one file and classes in another, or you could group related functionality together into files. Here we’ll just look at an example to build some familiarty, so that you can start splitting up your code as/when you want to.
5.2.2.1. Our two code files
We’ll continue to use the StudentMarksEEEN11202 example from the first part of the lab. We’ll split the code into two files.
In your Lab G
srcfolder make one code file and call itmy_lib.py. Enter the code below into it.import numpy as np class NoSubmission: """ Class to represent no submission made. """ def __init__(self): self.value = np.nan def __str__(self): return "No Submission" def __repr__(self): return "No Submission" class StudentMarksEEEN11202: """ Docstring for StudentMarksEEEN11202 """ def __init__(self, name, id): no_assignments = 20 self.name = name self.id = id self.assignment_marks = np.full((no_assignments,), NoSubmission()) self.exam_mark = NoSubmission() self.overall_mark = NoSubmission() def set_exam_mark(self, mark): self.exam_mark = mark self._set_overall_mark() def set_assignment_mark(self, assignment_letter, mark): index = ord(assignment_letter.lower()) - ord("a") # adjust for 0-based indexing self.assignment_marks[index] = mark self._set_overall_mark() def _set_overall_mark(self): assignment_weight = 0.5 exam_weight = 0.5 # Set exam to zero if no submission tmp_exam_mark = self.exam_mark if isinstance(tmp_exam_mark, NoSubmission): tmp_exam_mark = 0 # Set assignments to zero if no submission, and sum tmp_assignment_mark = 0 for assignment_mark in self.assignment_marks: if isinstance(assignment_mark, NoSubmission): tmp_assignment_mark += 0 else: tmp_assignment_mark += assignment_mark # Calculate overall mark self.overall_mark = ( assignment_weight * tmp_assignment_mark + exam_weight * tmp_exam_mark ) def display_student_info(student): print( f"Student Name: {student.name}\n" f"ID: {student.id}\n" f"Assignment marks: {student.assignment_marks}\n" f"Exam mark: {student.exam_mark}\n" f"Overall mark: {student.overall_mark}\n" )
Make another code file and call it
process_student_marks.py. Enter the code below into it.def main(): # Create instance of StudentMarksEEEN11202 student1 = StudentMarksEEEN11202("Alex", "12345") student2 = StudentMarksEEEN11202("Casson", "67890") # Set marks for student1 student1.set_assignment_mark("A", 2) student1.set_assignment_mark("b", 5) student1.set_exam_mark(65) # Print contents for student in (student1, student2): display_student_info(student) if __name__ == "__main__": main()
This code is exactly the same as what we had in the first part of the lab, except that we’ve added a function called
display_student_info()to make the display to the screen slightly more tidy.In VSCode, in
process_student_marks.pyyou’ll see that various parts are underlined in red by the static code analysis. Although the two code files are in the same folder they can’t automatically see each other. We have to explicitlyimportwhat we want. We’ll look at a few different ways of doing this.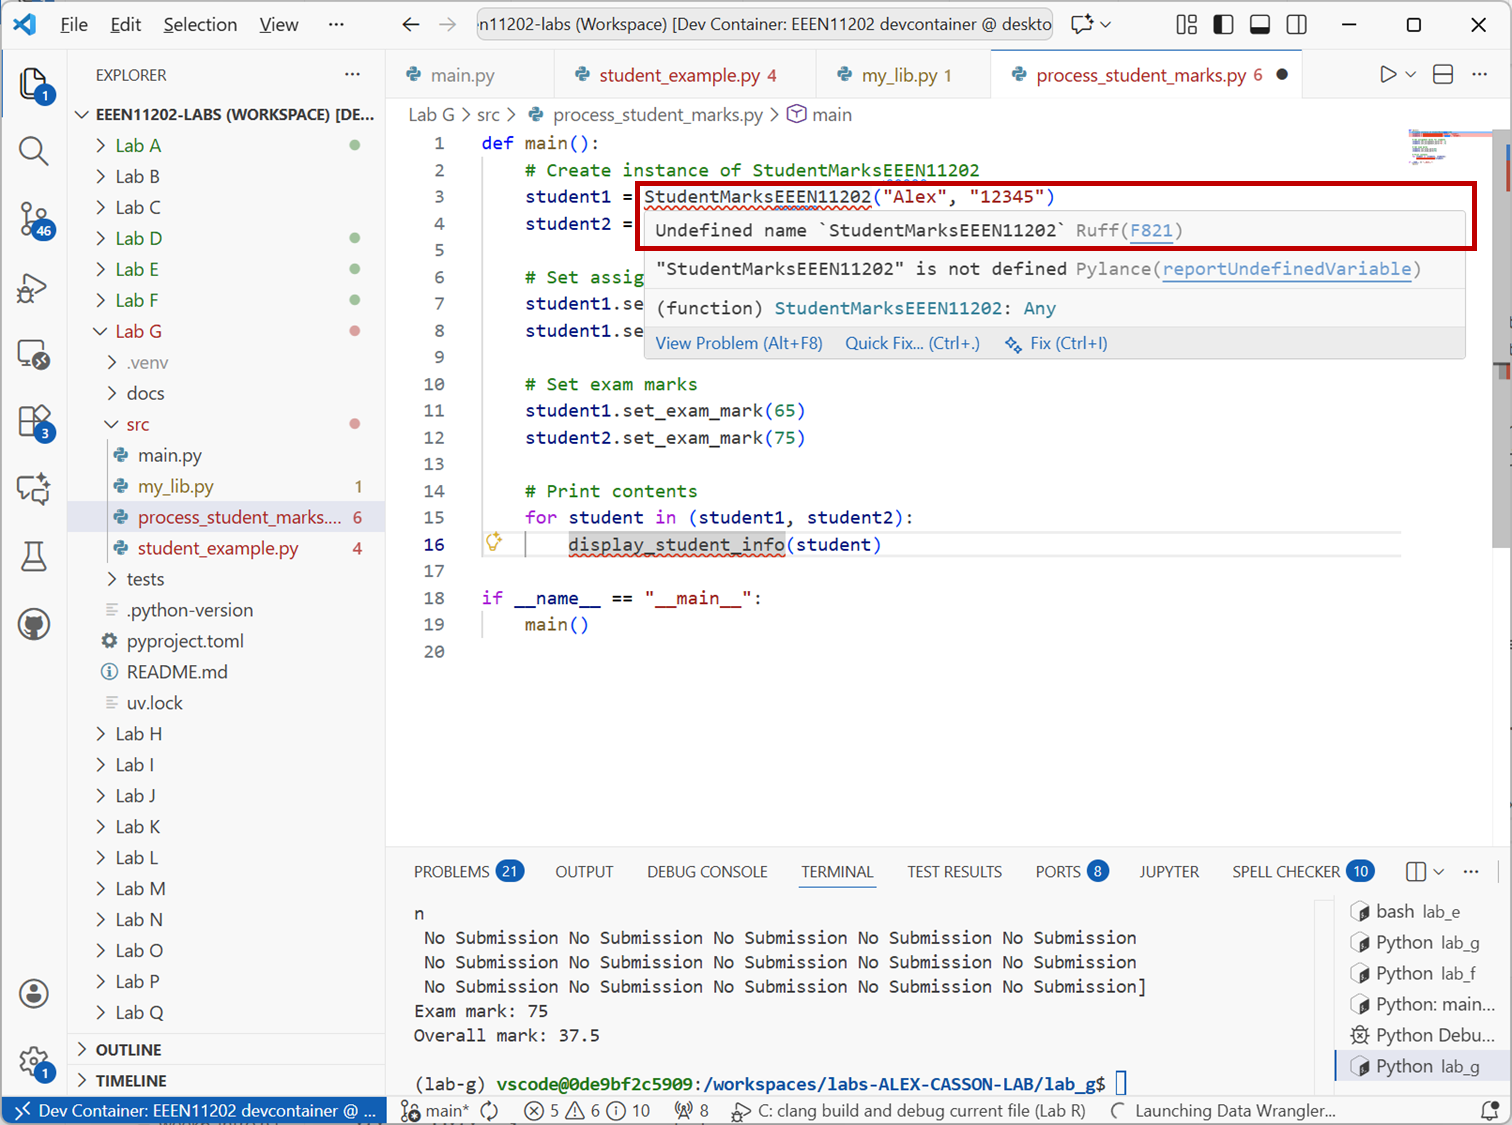
Screenshot of VSCode, software from Microsoft. See course copyright statement.
At the top of
process_student_marks.py, add the line below to import the whole ofmy_lib.py.from my_lib import *
If you now run
process_student_marks.pyit should work as before. This command imports everything frommy_lib.pyinto the current file.The problem with this approach is that if
my_lib.pyandprocess_student_marks.pyboth have functions or classes with the same names, there will be a conflict. Python won’t know which one to use.As such, the above isn’t the recommended approach.
Instead, change the import statement to be
from my_lib import StudentMarksEEEN11202, display_student_info
We’re now being more explicit about what we want to import. The code should work as before, and the static code analysis will complain less.
Note that we haven’t imported
NoSubmission. None of the code inprocess_student_marks.pyusesNoSubmission. Code inmy_lib.pydoes useNoSubmission, and that’s fine because they’re in the same file.In the same way,
process_student_marks.pydoesn’t need to import numpy. It doesn’t use numpy directly, only the functions inmy_lib.pydo. As long asmy_lib.pyimports numpy, it will be fine.Change the import statement to be
from my_lib import StudentMarksEEEN11202
process_student_marks.pynow won’t work. It needsdisplay_student_info(), and we haven’t given access to it.As a last approach, change the import statement to be
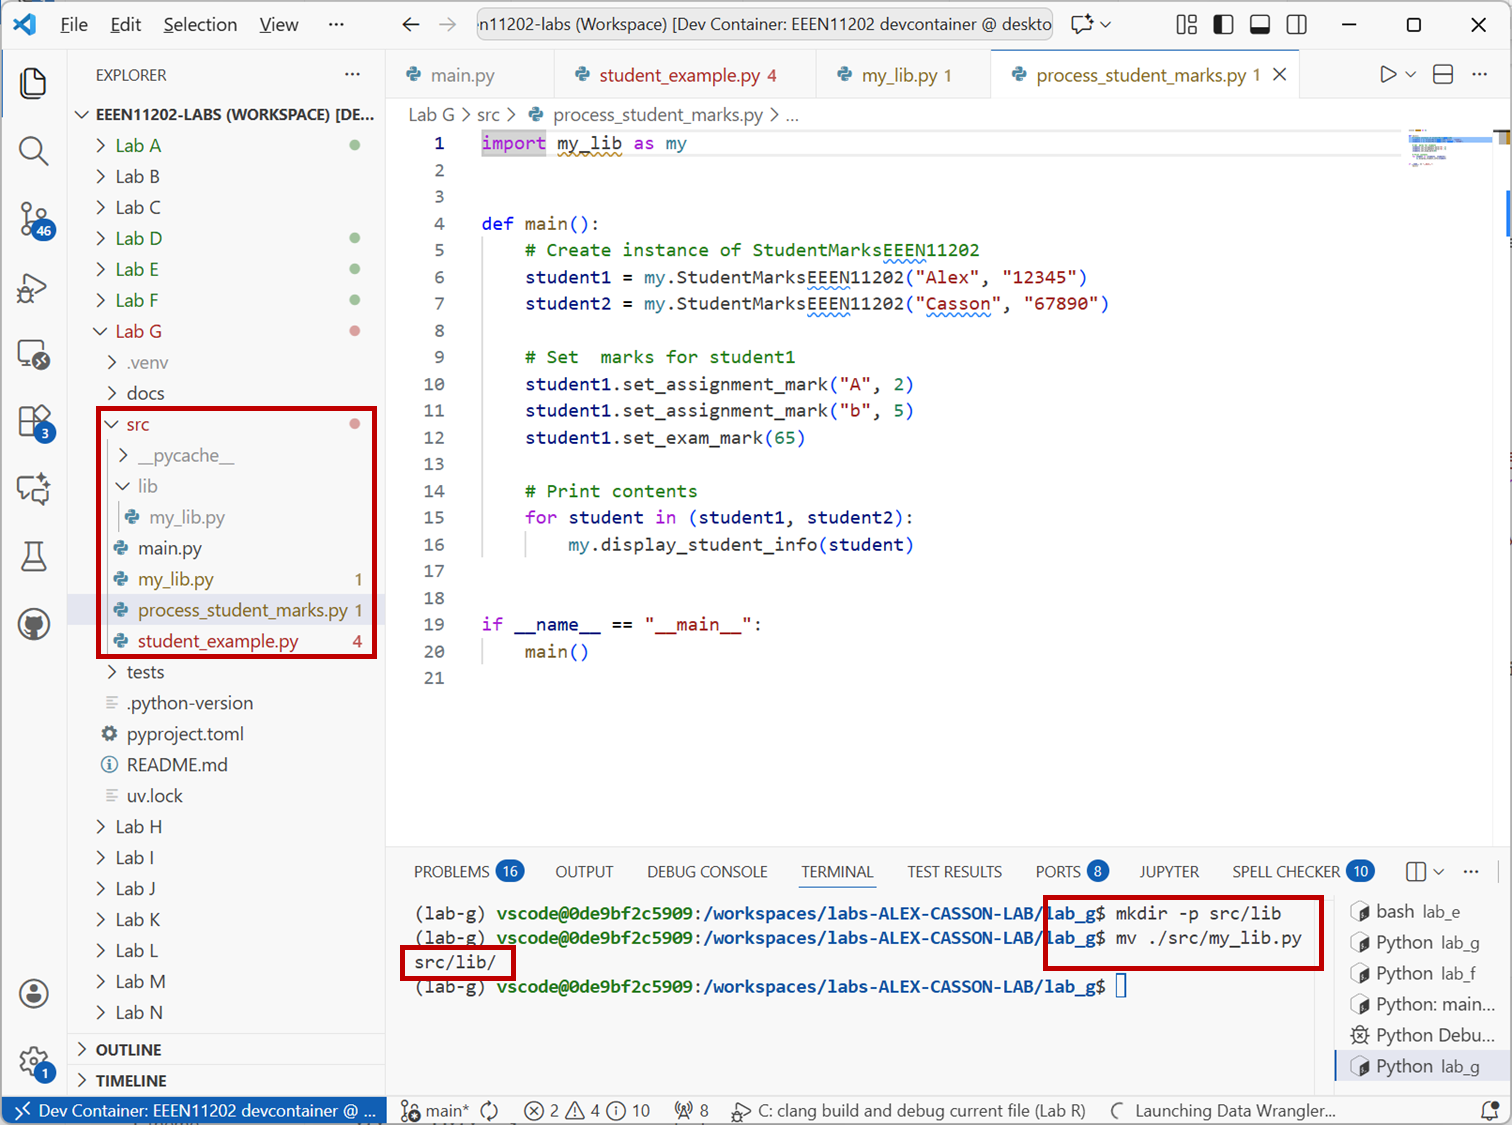
import my_lib as my
This has imported everything from
my_lib.py, and put it into a namespace calledmy. To access things frommy_lib.pywe now have to use the namespace.So,
StudentMarksEEEN11202becomesmy.StudentMarksEEEN11202, anddisplay_student_info()becomesmy.display_student_info().# Create instance of StudentMarksEEEN11202 student1 = my.StudentMarksEEEN11202("Alex", "12345") student2 = my.StudentMarksEEEN11202("Casson", "67890") ... my.display_student_info(student)
This is very useful when we’re importing lots of functions and classes from different sources which might have similar names.
Make these changes and check the code still runs as before.
Aside
import ... as ...andfrom ... import ... as ...actually do slightly different things if the file you’re importing has code at the global level in it, not just function and class definitions. We won’t worry about this here though.Make a folder in your
srcfolder calledliband movemy_lib.pyinto it. At the command line (assuming you’re in thelab-gfolder rather thanlab-g/src) you can do this withmkdir -p src/lib mv ./src/my_lib.py ./src/lib/
When done correctly, VSCode should look like the below.
Screenshot of VSCode, software from Microsoft. See course copyright statement.
The import statements now need a fuller address to where to find
my_lib.py. Python uses dots.to separate folder names. Try both of the below import statements inprocess_student_marks.pyto check that they work.from lib.my_lib import StudentMarksEEEN11202, display_student_info
or
import lib.my_lib as my
Using these approaches, you can organise your code into as many files and folders as you would like.
The main approach we’re going for is to have one file,
process_student_marks.pywhich is the main script that runs the code for the specific case that we want to solve. It is very factual, with clear names.student1.set_assignment_mark("b", 5) student1.set_exam_mark(65) display_student_info(student1)
so that we can look at it, and see it’s what we want. Functions, classes and similar are then in a library which contains more complicated code, but also code which we have written unit tests for to check they work was wanted.