2.1. Theory
2.1.1. Security settings
In Lab A we will look at shell scripts. These let us collect together multiple commands for the command line to run them all at once, rather than one command at a time.
For security purposes, your computer will almost certainly block scripts from running by default. We need to take some additional steps to tell the computer the script is OK to run. This is important, because otherwise anything you download from the Internet could have a script hidden inside it. If they weren’t blocked from running by default, they might try and do nefarious things to your computer.
To prevent this, there is a process known as the active control list which sets what permissions a user has for working with any particular file. Briefly (and there can be more verbose settings which are not important here), a user may:
Have permission to read a file. That is, to view the contents, but not do anything else.
Have permission to write to a file. That is, to edit the contents of the file. Note you don’t necessarily need read permissions to have write permissions, you can just forcefully overwrite whatever is present.
Have permission to execute a file. That is, to run the file if it is a script or program.
You can have any mixture combination of these permissions.
The permissions are also separated out per-user. You can give one user specific permissions. Or set the same permissions for a group of users. Or give a default level of permissions for everyone. As you’re working by yourself we won’t worry about anything other that giving permissions so that you can run our scripts.
If you type:
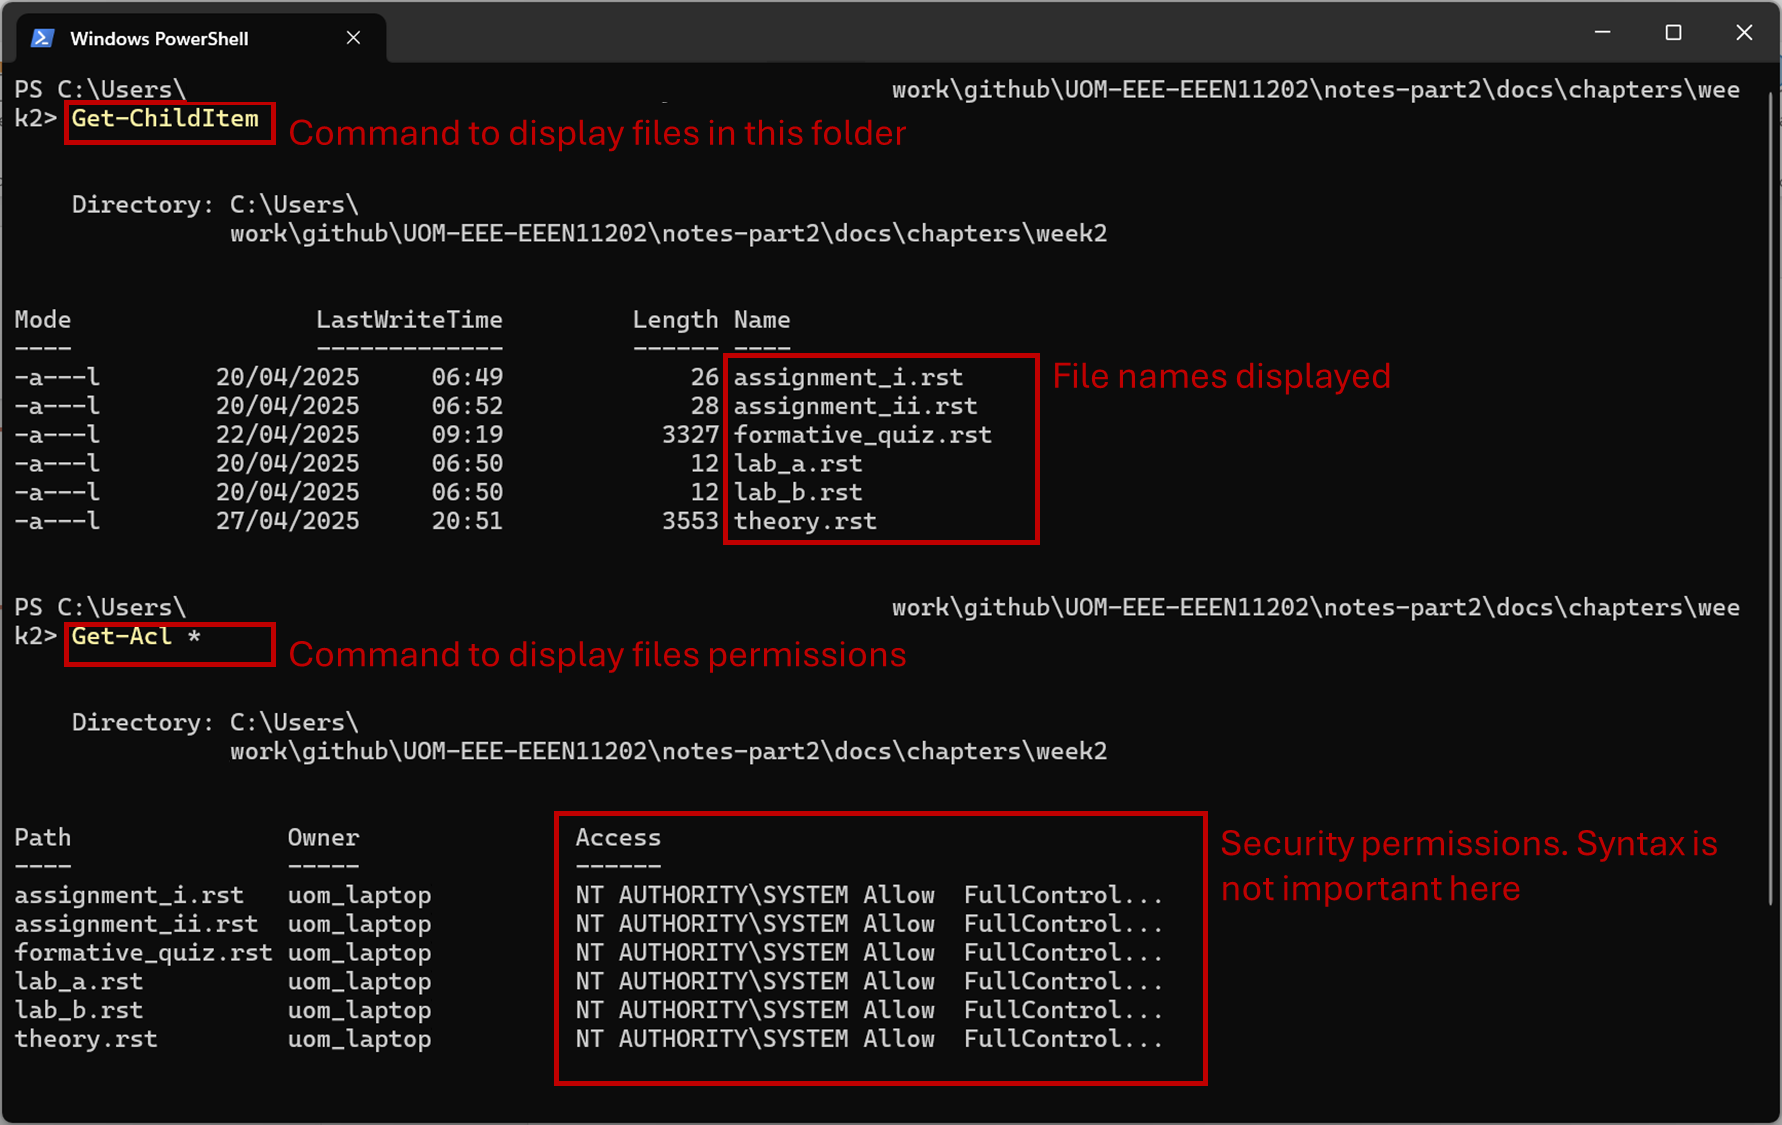
Get-ChildItem
Get-Acl *
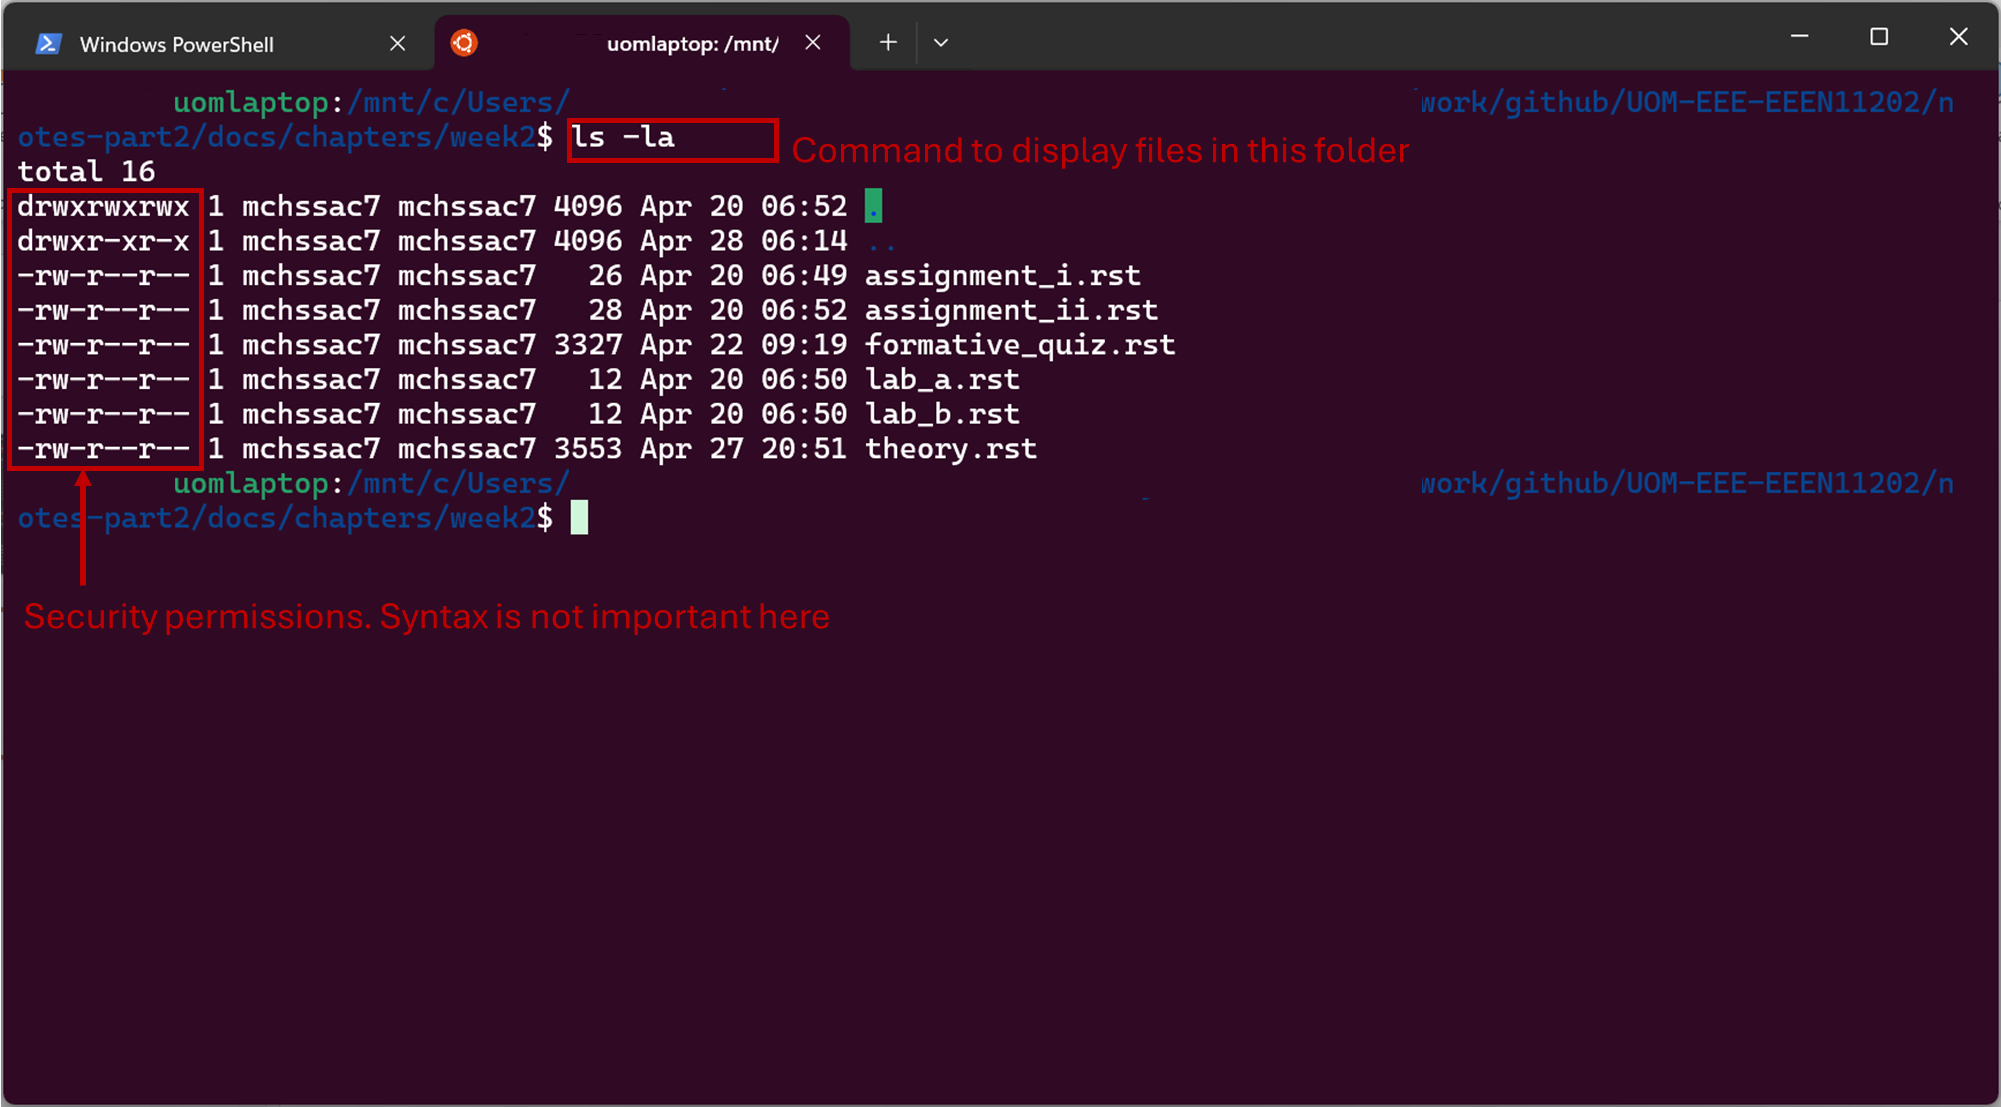
ls -la
into the command line you will get a display of the permissions that are present. (Remember the > or $ is displayed by the terminal for you. You don’t need to enter it, it’s to show you each command.) This display is slightly different depending on your operating system. Examples are shown below. We won’t worry about the exact syntax of these here.
Screenshot of the Windows terminal, software from Microsoft. See course copyright statement.
Screenshot of the Windows terminal, software from Microsoft. See course copyright statement.
In order to run a script directly at the command line the user must have execute permissions for that file. They don’t necessarily need other permissions. We won’t go into any more depth on this here. We’ll see how to give our scripts the permissions they need to run as part of the lab.
Note that we generally only need to worry about permissions when looking at shell scripts. With other programming files, they are automatically given execute permissions behind the scenes because they’re not started directly from the command line, due to the details of how a program is compiled.
2.1.2. Python virtual environments
In Lab B we will start looking at Python. We’ll do this over multiple labs, as there are many different things to learn. Lab B will focus on getting up and running. To do this virtual environments are a key thing to understand. You can use Python without using virtual environments, but it makes it very hard to maintain your code and to share it with others.
Your computer probably has Python already installed on it. It will be being used by various different programs that you have installed. We don’t want to use this Python. It will be a particular version, whatever is needed to make your computer work. It will have a number of external libraries installed, again whatever is needed to make your computer work. If we change the version of one of these, say because we need a newer version for our code, then everything else on the computer might break. You’ll quickly find that there are lots of different versions of Python, and lots of different external libraries that you might use. Having one installed copy of Python for everything you might want to do quickly leads to incompatibilities between different programs needing different versions.
To overcome this, Python uses virtual environments. Essentially, having a different copy of Python installed in each different virtual environment. Different sets of Python code can thus be completely isolated from each other, and can have different versions of Python installed. The rule of thumb would be that you should never use the computer Python, you should always use one which is in a virtual environment.
We create these virtual environments with a command that involves venv, which we’ll see in the labs. In general, we have one virtual environment per project. There’s no hard rule for what a project is. You could have one larger virtual environment you do all of your work in, or lots of smaller ones. We’ve set up the course such that one lab is one project. This gives you more chance to practice making and working with virtual environments, and less chance of having incompatibilities between the different labs if you want to install different versions of libraries for some reason.
Having a good understanding of virtual environments is the key first step in writing maintainable Python code, rather than just writing Python code that works but is hard to share with others.
2.1.3. Different ways of running Python
Writing Python refers to the process of entering Python commands into the computer, and getting the computer to run these commands. There are multiple different ways in which we can do this. We go over the four main ones below. In this course we’re going to focus on (2) and (3).
Interactively. Here we enter Python commands one at a time. You start Python at the command line with
python3 -I(This example is using Linux, as we’ll use in the labs.) The
-Itells Python to start in interactive mode.)If you enter this command, you’ll see that the command prompt changes from
$to>>>as shown in the figure below. This is the Python command prompt. It works much like the computer command prompt that you’ll learn about in Lab A, but it accepts Python commands.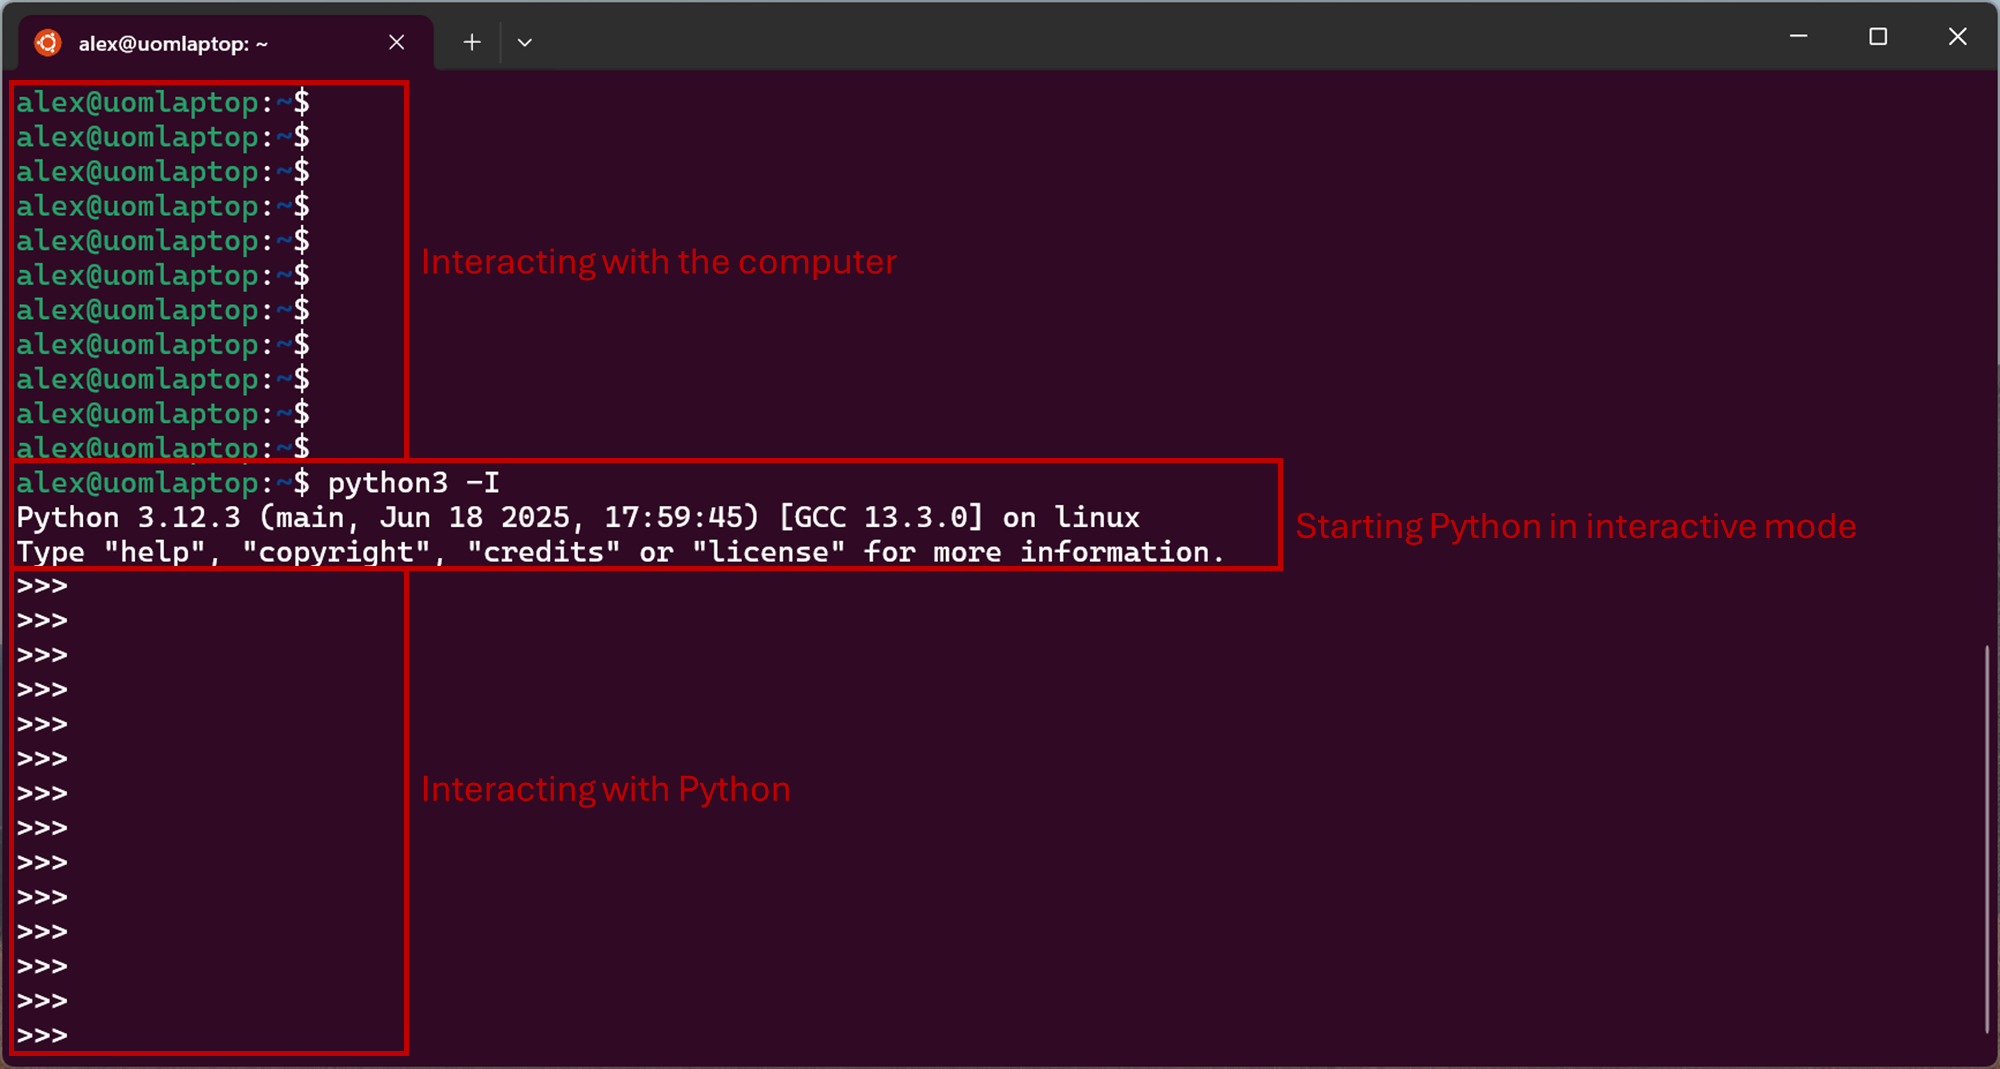
Screenshot of the Windows terminal, software from Microsoft. See course copyright statement.
Interactive mode can be extremely useful, but it’s not very scalable entering one command at a time.
Jupyter notebooks. Here we store multiple commands in a file. These files have a
.ipynbextension to indicate they are a Jupyter Notebook.The Python commands in the file are automatically run one after another. Importantly, the file is still run interactively. That is, information in the file is displayed on the screen for us as it is being run. This lets us inspect the values of variables variables, and to re-run parts of the file if we want to. It’s very useful, and widely used in data science applications of Python. Often data science analyses are exploratory. We don’t necessarily know in advance exactly what we want to do, we need to load the data and have to look at it and explore different things. Nevertheless, in this mode the commands are saved in a file, so we can run lots of commands in sequence, and run the same sequence again if we come back to the data later. Some people refer to a REPL loop in Python: Read, Evaluate, Print, and Loop; that is, to interactive work with your data and changing the code to get the behavior you want.
Cell based interactively. By convention Python code files have a
.pyextension. We can run these files in different ways, one of which is to run it interactively, very similar to how Jupyter Notebooks work. Here we can run the code one section, cell, at a time, inspecting variables as we go along. This is very useful for development and debugging of code. Nevertheless the code is in a standard Python code file rather than a special Jupyter Notebook file. Having a standard.pyfile is likely preferable for large projects once you’ve moved past the data exploration stage.We’ll see some examples of this type of working in the second part of Lab C.
In a development environment. Here we write code into a standard Python file, with a
.pyextension. We run the code all at once, rather than interactively. However, to help with development we can pause the code in the debugger. This lets us inspect variables at particular points in the code, and step through the code one line at a time to see how it works. This is probably the most scalable way of working with Python code, and is widely used in professional software development.This is the approach we’ll use for most of the course.
As a script Here the commands are stored in a file, and we just ask for all of the commands to be run and get the end result. This is useful once we’ve got our finalized code and, say, want to run it hundreds or thousands of time on different data sets. If your Python code is stored in a file called
my_code.py, then you can run it with:python3 my_code.pyor
uv run my_code.pyAgain, VSCode has a number of different buttons for starting this code from the graphical interface rather than the command line if that’s what you prefer. (The difference between the above commands is that
uv runwill automatically start (and make if needed) a virtual environment.python3assumes you’ve already activated one, or have a default Python installation setup.)You won’t be able to view the intermediate results, but you can see the final result. (Unless there’s an error and the script stops running part way through.)
You’ll see some examples of this in the course, but as we’re more focused on developing code rather than just running finalized code, it doesn’t come up that much.
As a package or module. For all of the above our code will be in a file, mainly with a
.pyextension. We can share this file with others and they’ll be able to run it (as long as their virtual environment has a suitable Python version and libraries installed). You’ll find that we often use code from others, not by sharing a.pyfile, but by installing it using a tool calledpip. This is a more formal way of sharing code, and adding it to a Python installation. It is an easier way of sharing code with lots of people, especially if the code is split into lots of different files. There are repositories, such as PyPI, where people have uploaded their code to be installed by others. To share code like this we need to make a package from the.py.
We won’t cover how to make a Python package in this course. You can find out more in the Python documentation if you are interested.